One of the things we value most in our lives is our emails. They contain important information, memories, and data we do not want to lose. However, we often rely on our preferred email platform to keep them safe, without considering that we could lose them if something goes wrong.
Fortunately, there is a simple way to protect them, backing them up. And, in the case of Gmail, the process is not complicated. In this guide, we will show you how to back up your Gmail emails step-by-step and download them to your device so you can access them without worries.
How to back up your Gmail account
To back up your Gmail emails, you must first log in to Google Takeout from a web browser on your Android device. Once you are logged in, follow these steps:
- Log in to your Gmail account.
- Check the box that says "Email". This will ensure that only your Gmail emails are backed up.
- Tap on "Next Step" to continue.
- Choose the details of your backup, such as file type, maximum size, and delivery frequency.
- After selecting your preferences, scroll down and tap the "Create Export" button.
- Google will start preparing your backup. This may take some time, depending on how much data you have on your Gmail account.
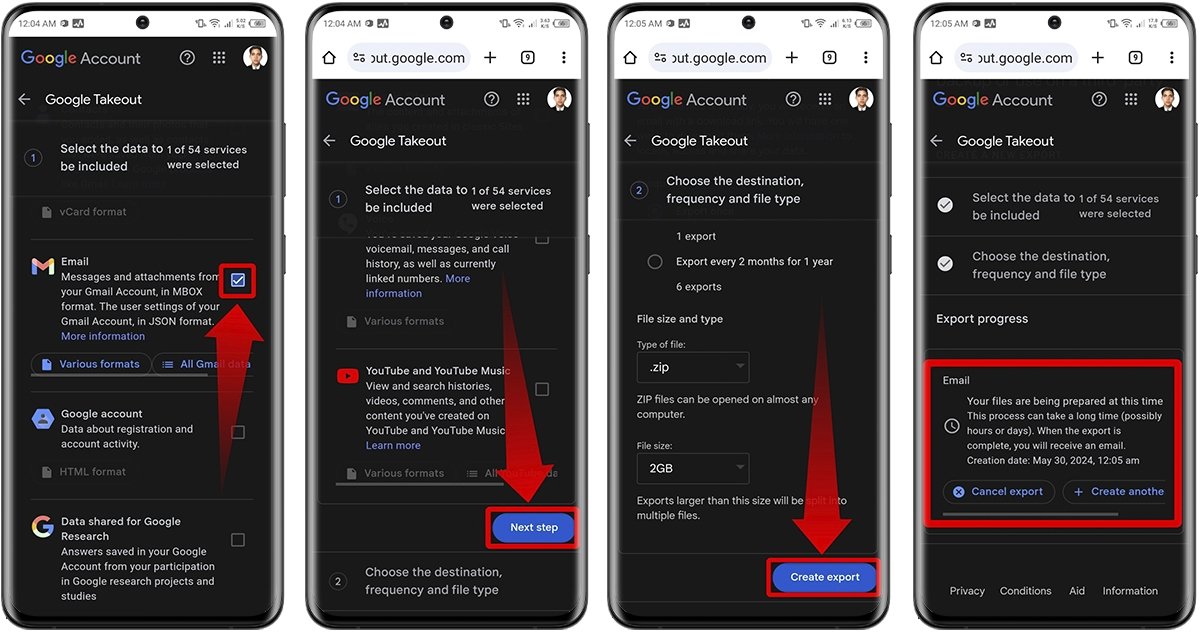 How to back up your Gmail
How to download your Gmail backup
Once the backup is ready, you will see in your inbox a notification email with a link to download it. To download your Gmail backup successfully, follow these steps:
- Open your email and look for the notification message from Google about your exported data.
- Tap on the link provided in the email. This will take you back to Google Takeout.
- You will find your backup ready for download on the Google Takeout page. Just tap the download button to start downloading the file.
- When the download finishes, your Gmail email backup will be saved on your device.
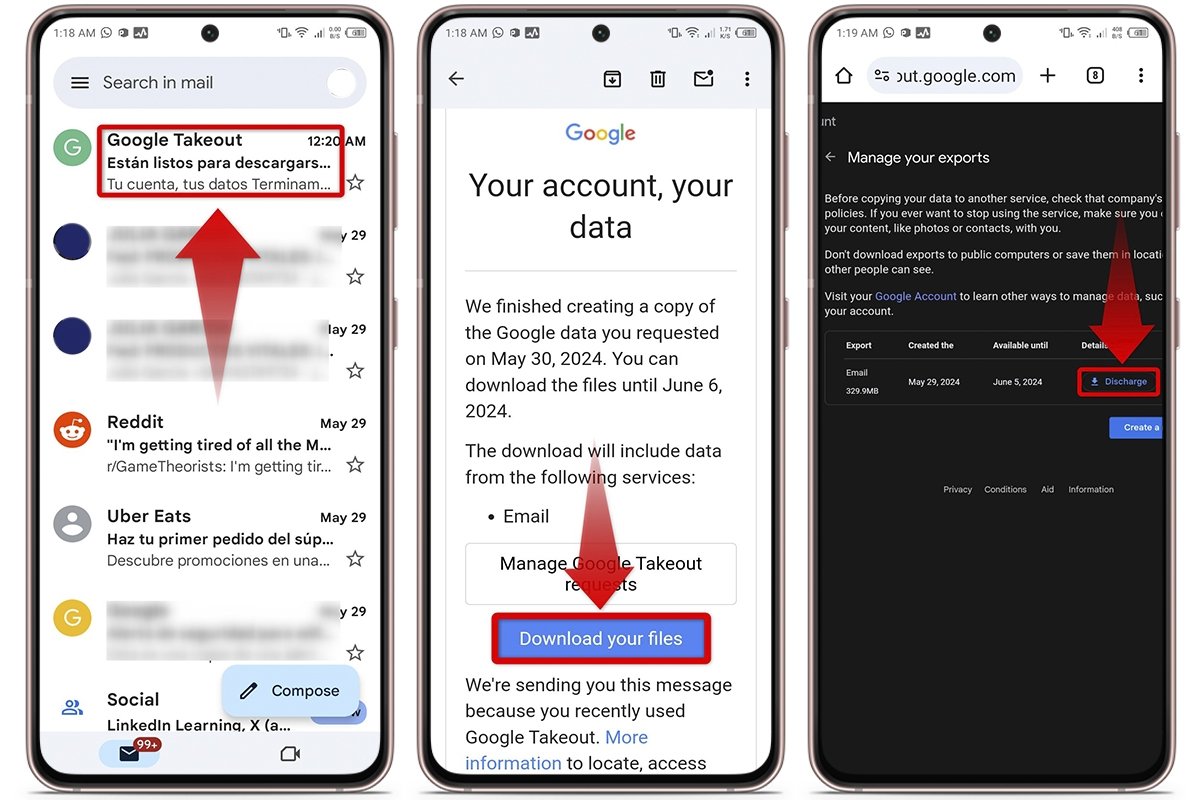 How to download your Gmail backup
How to import a backup of your emails to Gmail
If you ever need to bring your backup emails to Gmail, you can do so easily. Just make sure you have a Gmail account ready to receive all the information.
First, adjust the Gmail settings on your Android device to access desktop mode to take full advantage of all available features. Follow these steps to do so:
- Log in to your favorite browser from your smartphone.
- In the search bar, type "Gmail" and select the corresponding result.
- Locate and tap the three vertical dots in the upper right corner of the screen.
- Choose the "Desktop version" option to access the full version of Gmail.
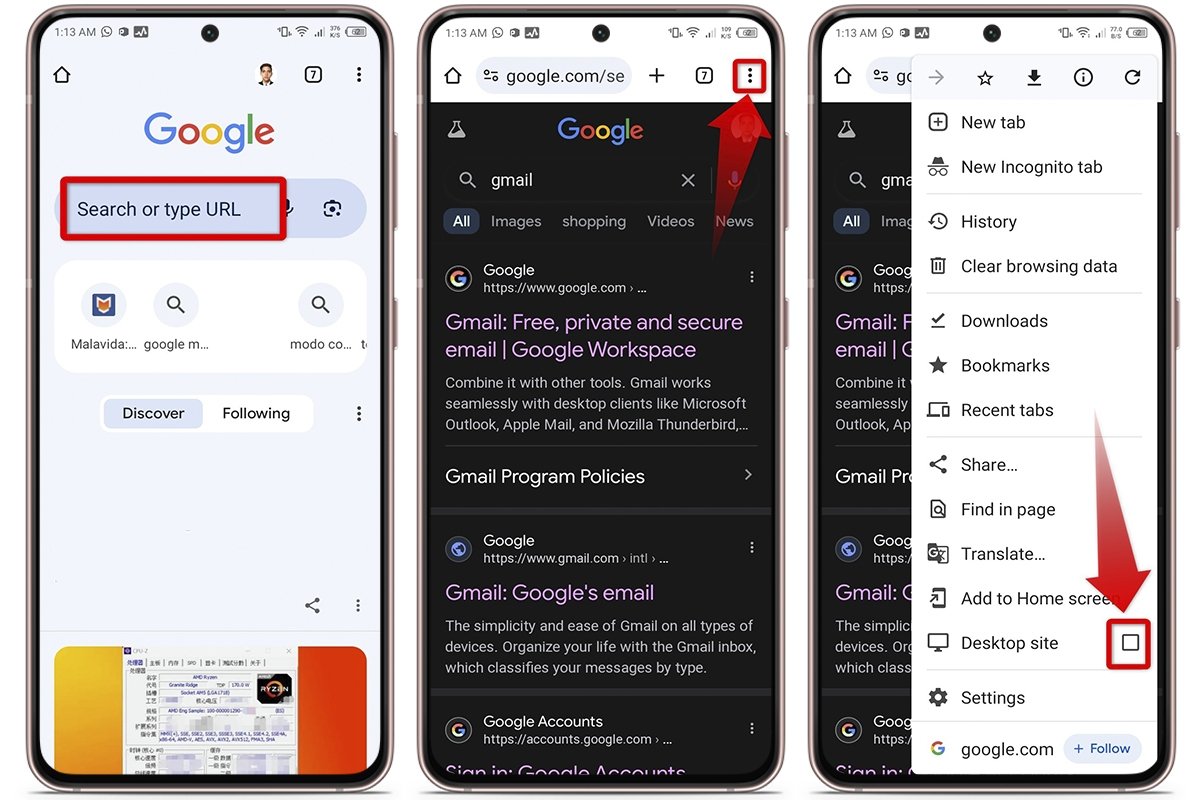 Update the Gmail version on your mobile device
If you have already entered Gmail desktop mode, it is time to configure your account settings to import backup emails. To do so, follow these steps:
- Log in to your new email address.
- Tap the settings icon in the upper right corner, usually represented by a gear.
- Tap on "View all settings."
- Select "Accounts and import."
- Choose "Import emails and contacts."
- Select the email account from where you want to take the information and tap "Continue."
- Log in with the credentials and grant the corresponding permissions.
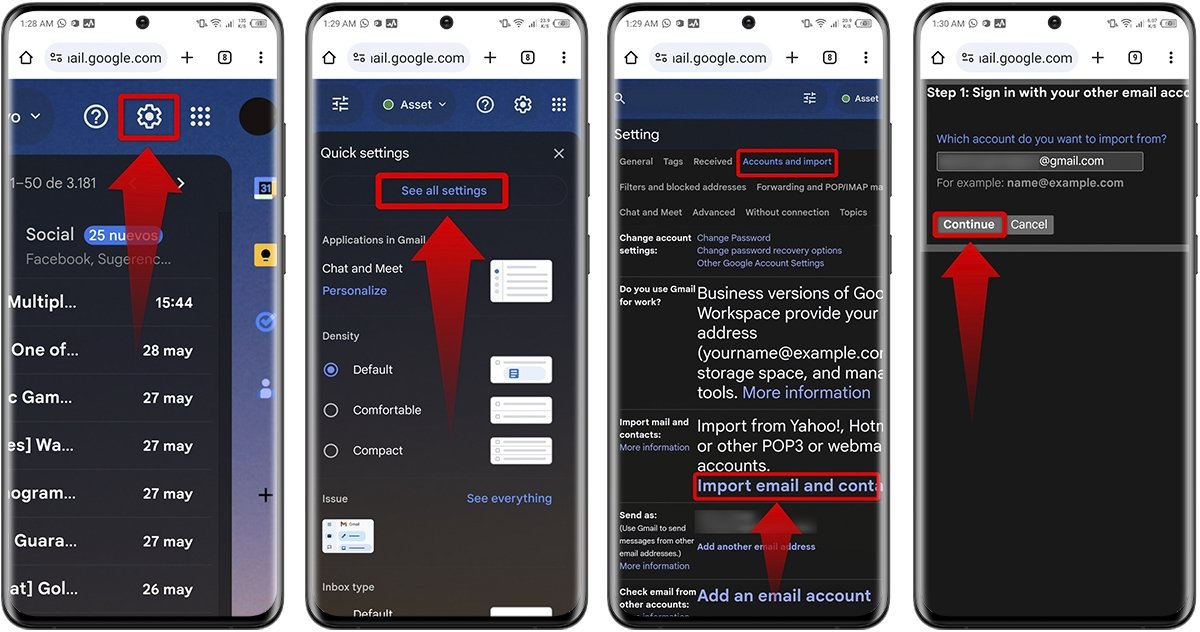 Customize your account's settings to import emails
After configuring the settings and connecting the account, follow these steps to complete the import of your emails:
- A pop-up blocking window will appear; in this case, tap "OK" and select the "Always show" option.
- Choose again the Gmail account from where you want to take the information and tap on "Continue."
- Start the import and verify that it is completed correctly.
- Enable access to Gmail Shuttle Cloud Migration to complete the import process.
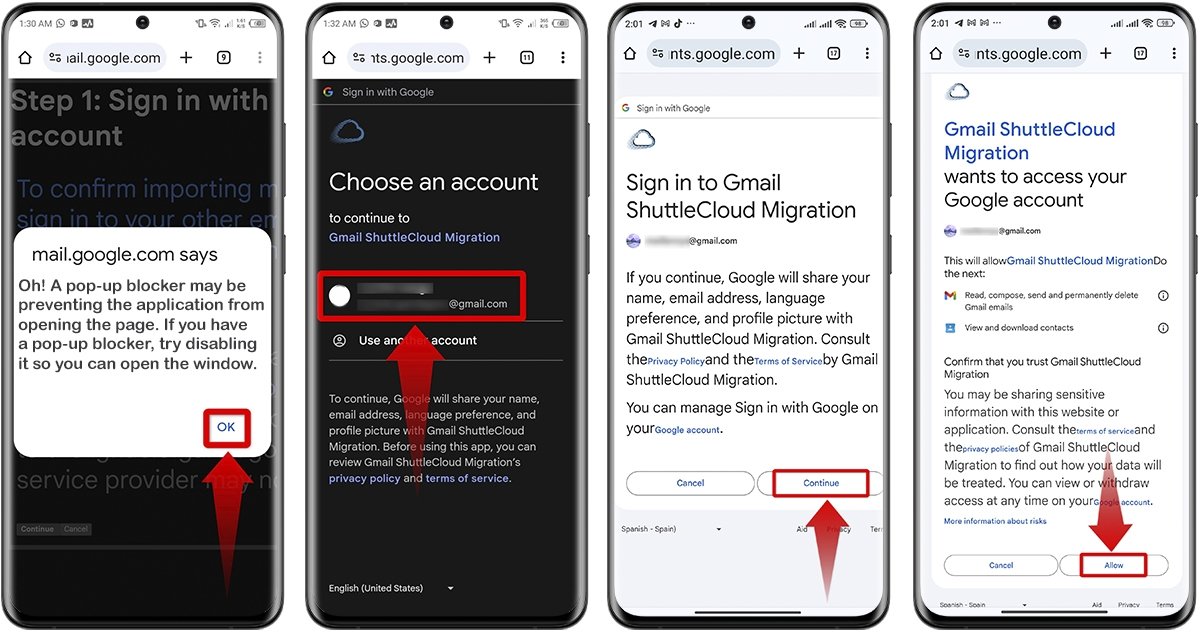 Complete the import of your emails
At the end of the import, it is important to confirm all emails were transferred correctly. This is what you must do to verify the import:
- Go to the "Accounts and import" section.
- A "This import has not been started" message will appear.
- Tap the "Provide information" option, which appears next to it.
- Select "Import mail" only.
- Select the "Start import" button.
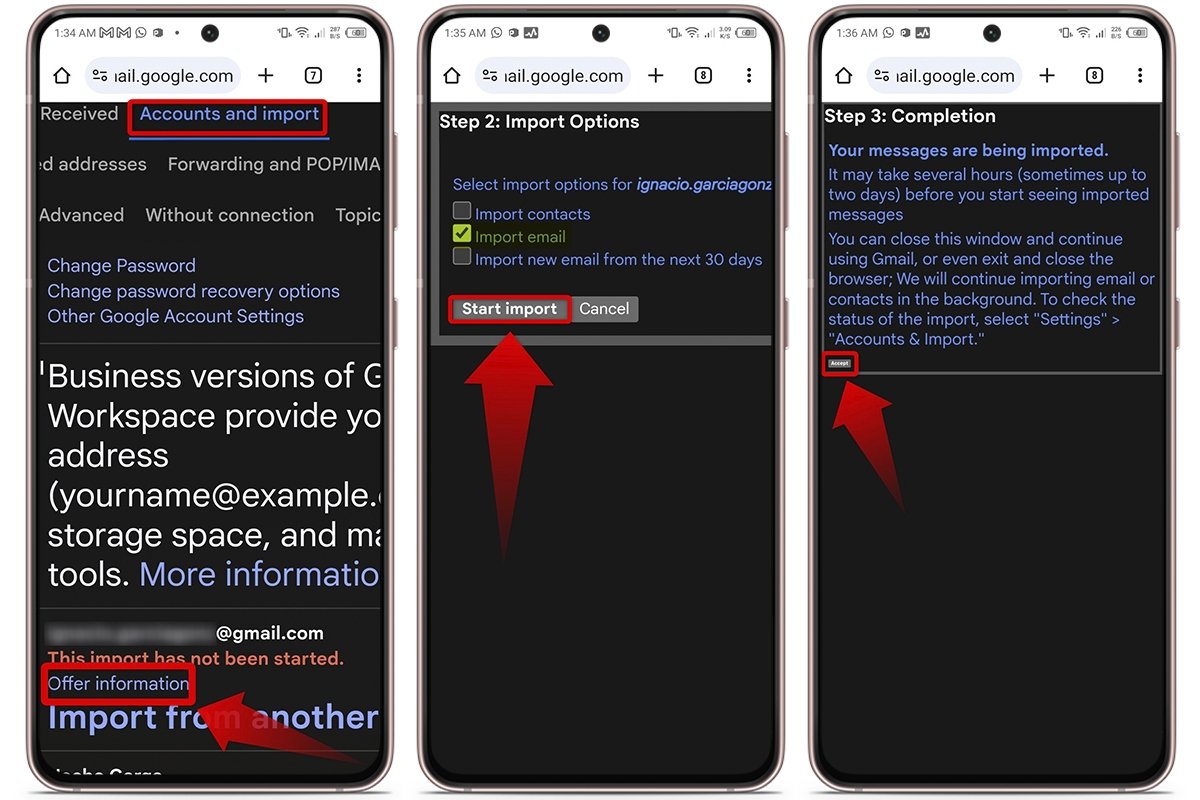 Make sure all your emails have been transferred without trouble
This process can take minutes or even hours, depending on how many emails you have backed up. At the end, tap on "Accept" and you are done.

