The HDR effect consists of overlaying several identical photographs, but with different exposures. Thanks to this method, it is possible to obtain vibrant colors in all areas of the photograph. HDR is very useful in certain situations, such as when photographing a window from inside a room. In that case, due to HDR, a good illumination of the room is achieved without losing the view outside the window.
But what happens if you only have one shot? Photoshop can help you. Thanks to its HDR Toning function, HDR-like results can be obtained without having to take two or three shots with different exposures.
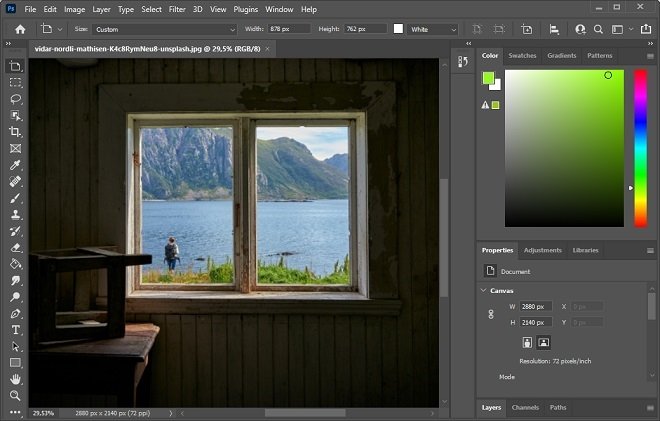
To begin, open the image you want to apply the HDR effect to. We have chosen a photo taken from a room, the interior zone, focusing on a window, the exterior zone. As you can see, the room is dark while the landscape in the window is perfectly visible.
 Image open in Photoshop
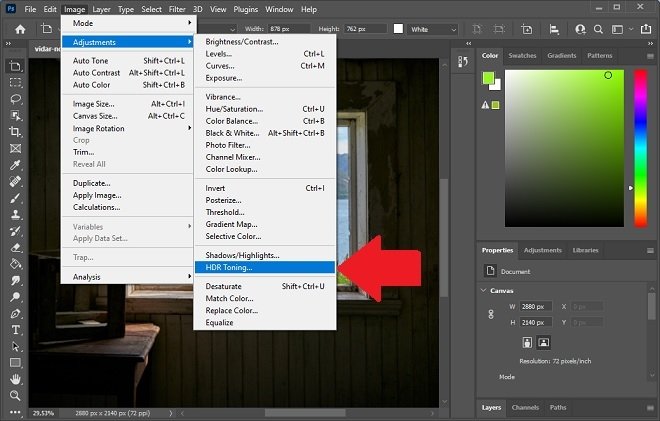
Next, go to Image, place the cursor on Adjustments, and click HDR Toning.
 HDR option in Photoshop
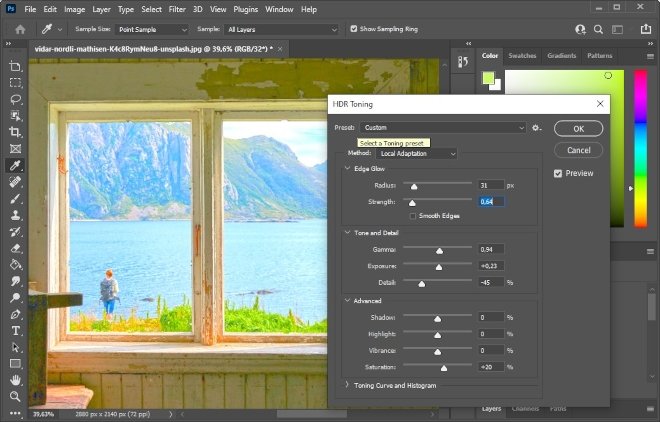
Photoshop will apply the effect automatically, at its discretion. However, you can make adjustments to tonality, exposure, or shadows. Make sure you have the Preview option enabled to see the changes in real-time. You can also select some default values in the list next to Preset. To save the changes, click OK.
 Final result of the effect
This function is ideal for shooting at night or under cloudy skies, as well as for indoor photos. With it, it is possible to appreciate details in both dark areas (shadows) and light areas (highlights). Remember to export the file with another name or store it in a PSD file so as not to lose the original photograph.


