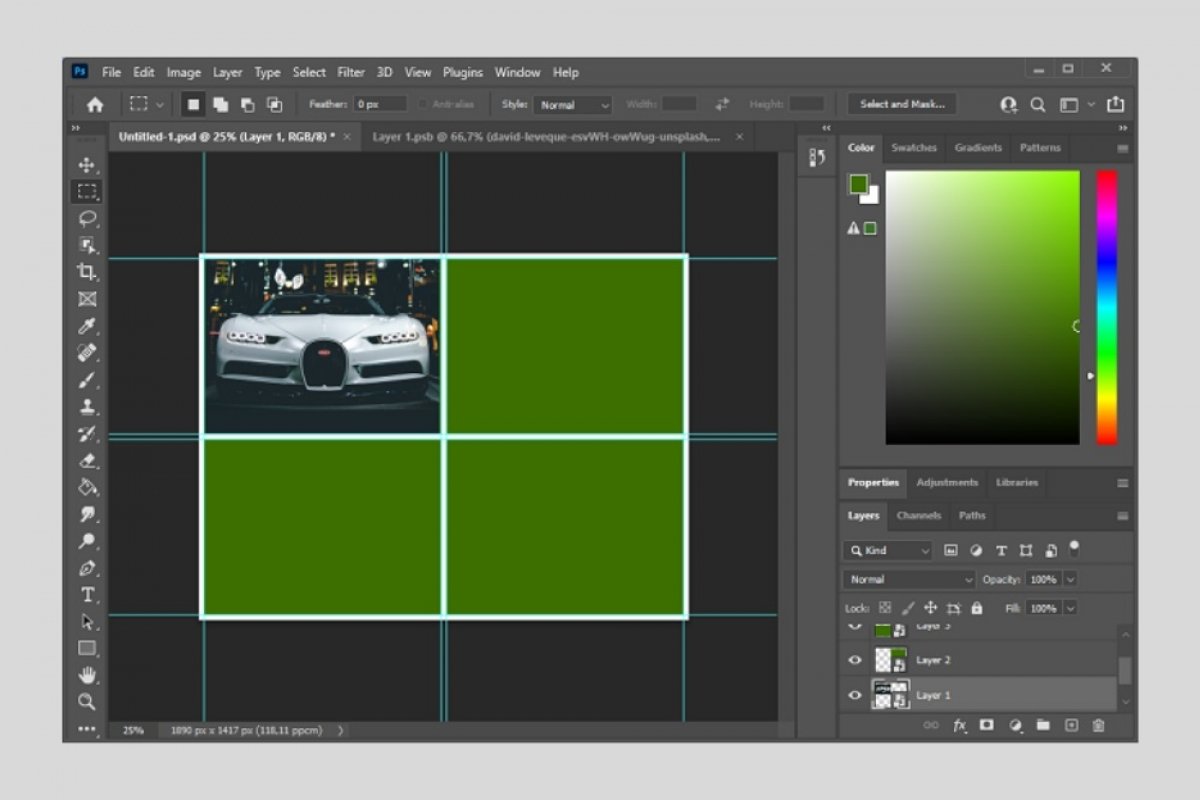
To create a collage with Photoshop you must follow the steps below. First, create a new project with the dimensions you consider necessary. These will depend on the number of photos you want to include in your collage. As an example, in this article, we will create a photocomposition with four spaces. When you have your new project, go to View and click on New Guide Layout.
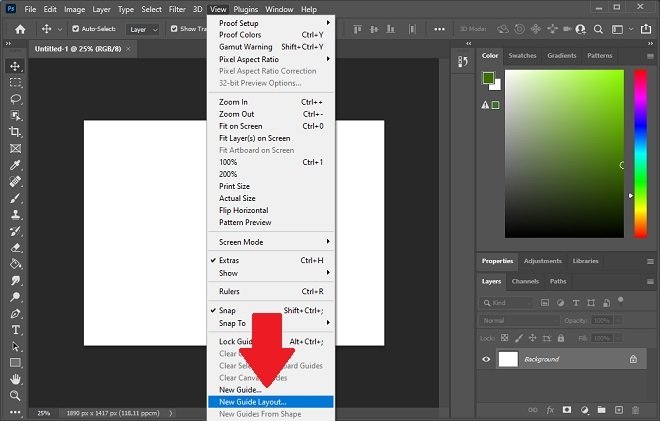 New guides template
In the pop-up window, select the number of columns and rows. You must also specify the space that must exist between each element. In the Margin section, you can define the document margins. Select OK to confirm.
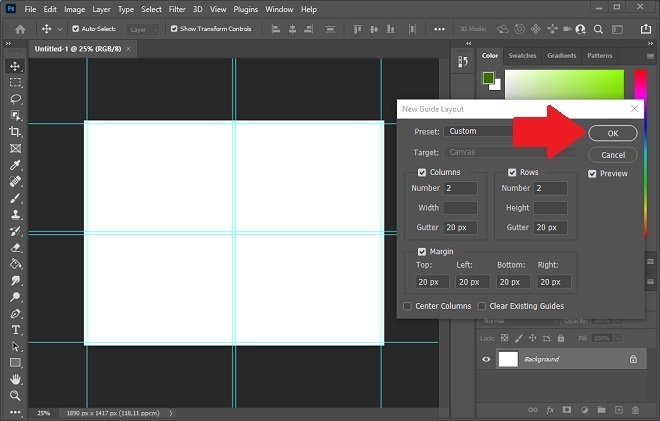 Create new guides
In a new layer, create a selection inside the first gap and use the Alt + Backspace combination to fill the space with the active color.
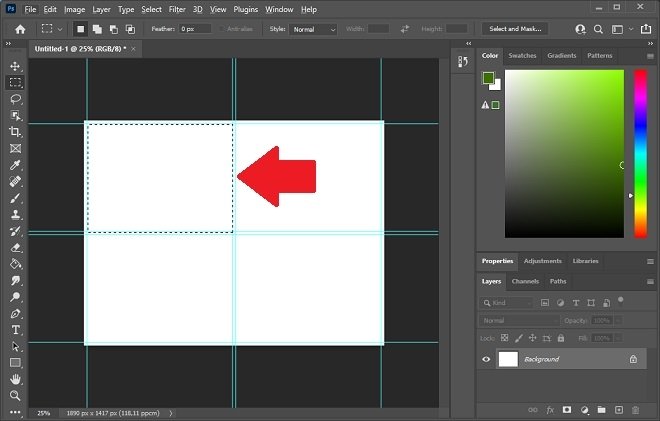 Create a selection in one of the gaps
Convert the layer you just filled into a smart object. Simply right-click on it and select Convert to Smart Object.
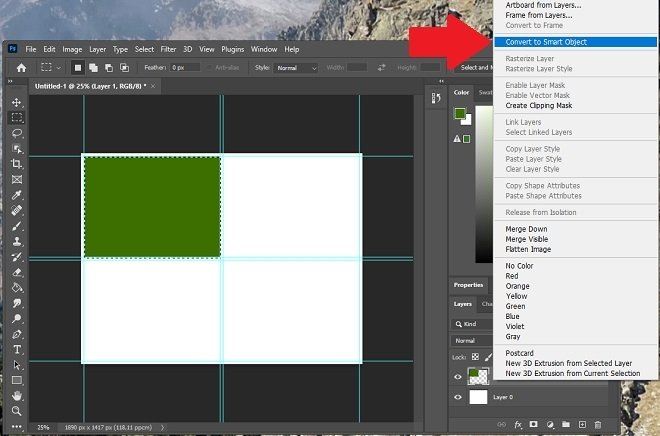 Convert the selection to a smart object
Repeat the process as many times as necessary, depending on the boxes you have decided to incorporate. Remember that each of them must have its layer, individually. Finally, you should obtain a result similar to the one you can see in the following image.
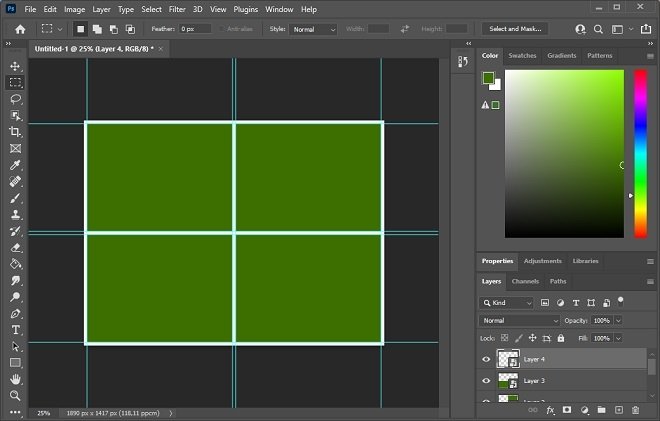 Collage template completed
It is time for you to save the changes in a PSD file. This file will serve as a template for later work. Then, double-click on the thumbnail of the layer that corresponds to the first box.
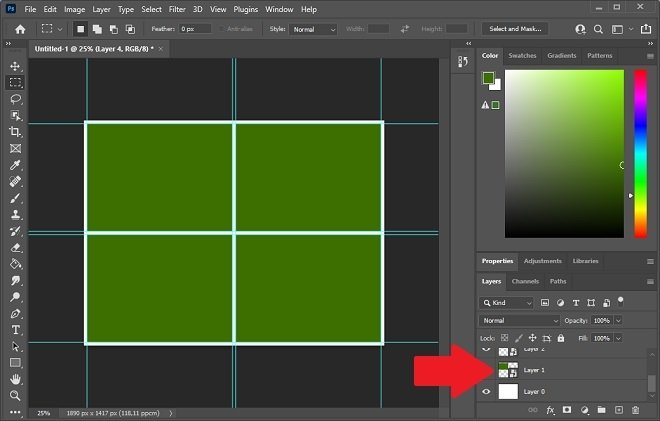 Edit the box individually
The contents of the layer will be displayed in an individual tab. Paste the image you want to insert in the first box.
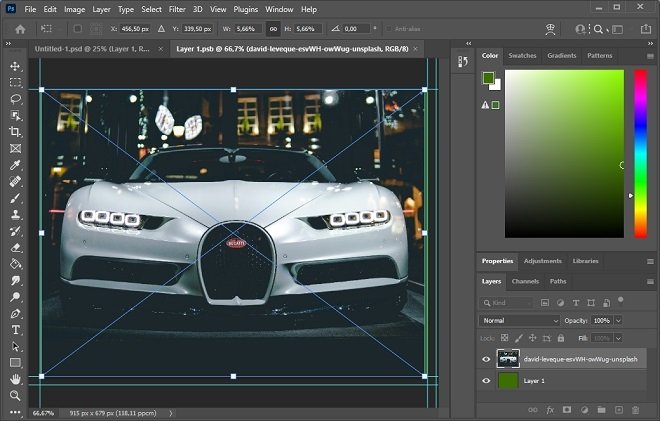 Paste the image into the box
Save the changes to the current tab and close it. When you return to the template, you will see the image you just pasted in the first box.
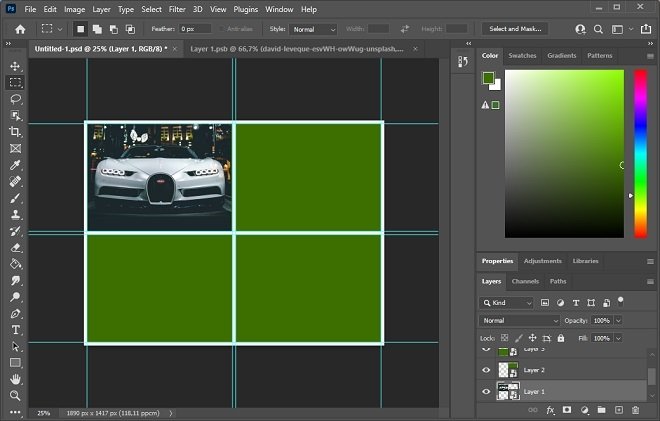 Image pasted into the first box
Repeat the process with the rest of the layers until you finish the collage. The advantage of using this method is that you can modify the content of each layer independently, replacing the images when necessary. Also, you can reuse the PSD file as many times as you want.

