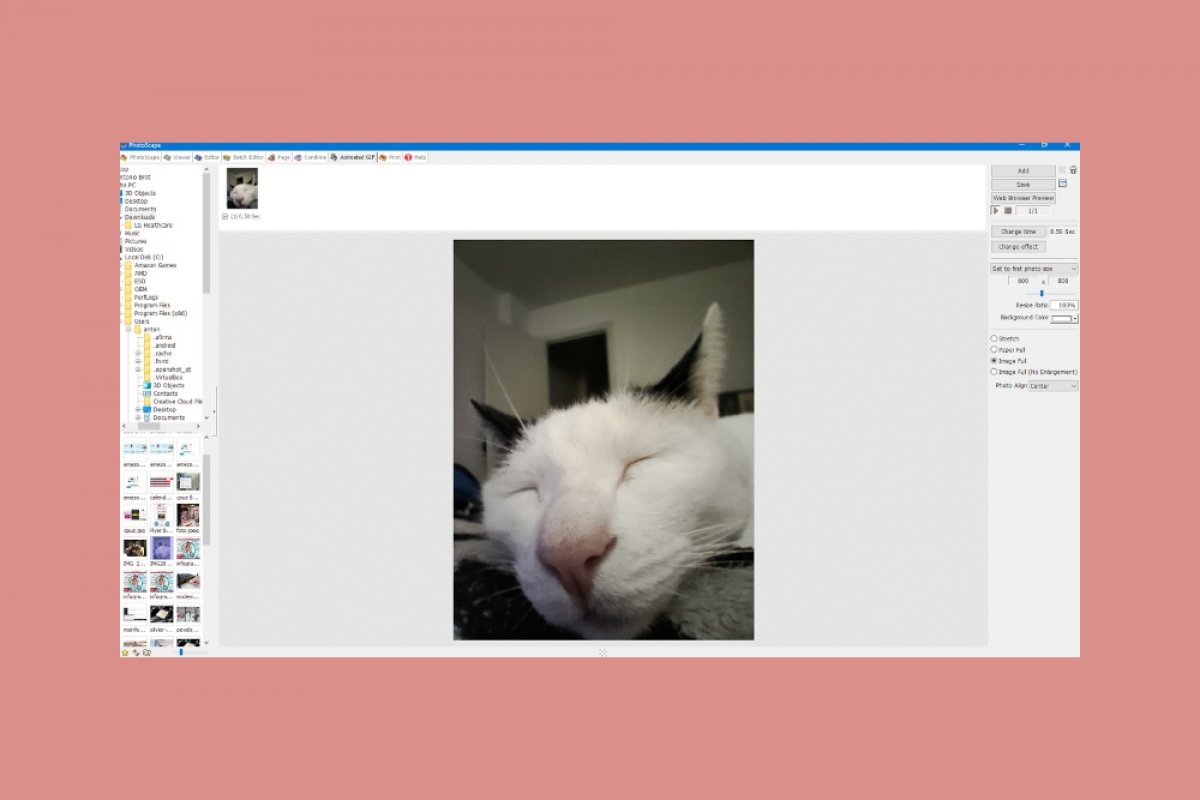
To make animated GIFs with PhotoScape, the first thing we have to do, of course, is to open PhotoScape. If we do not have it installed, we will have to download and install it. It is very simple and completely free of charge.
After opening it, we can access the function to make animated GIFs from two different areas. The first one, from the central wheel, on the icon shown in the following screenshot.
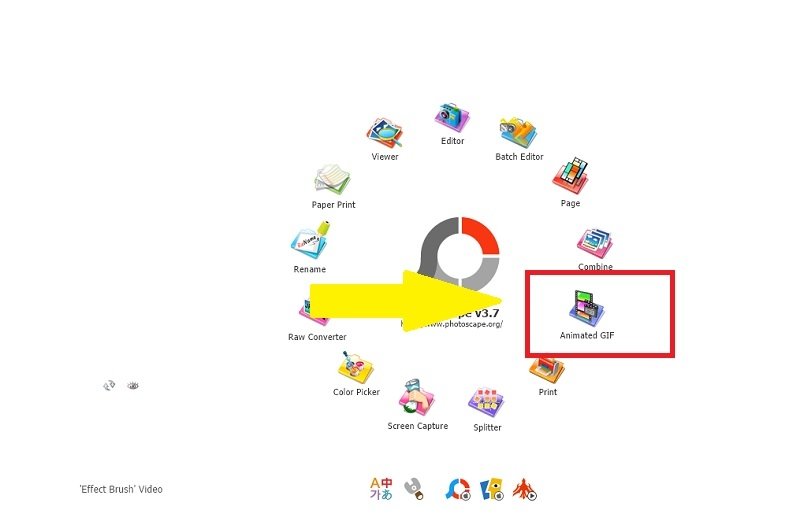 Open the animated GIF option
Another way is to choose the Animated GIF tab at the top of the screen.
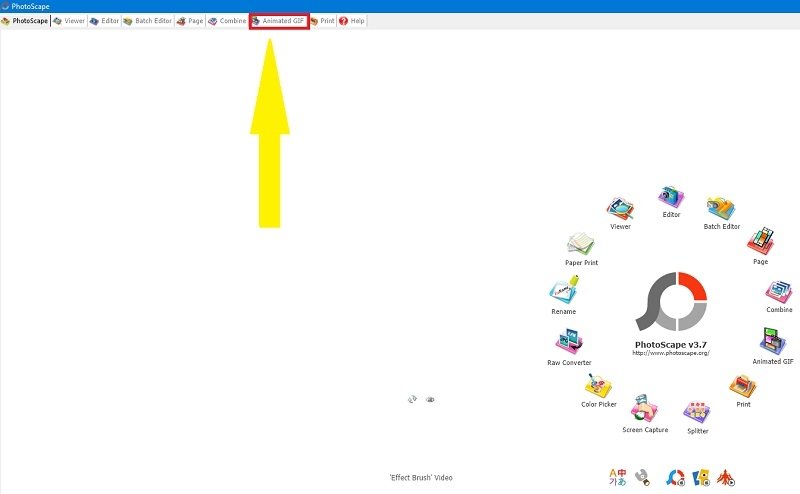 Open an animated GIF tab
A selection area will appear on the left side of the screen where we will be able to see the images we want to choose to be converted into an animated GIF.
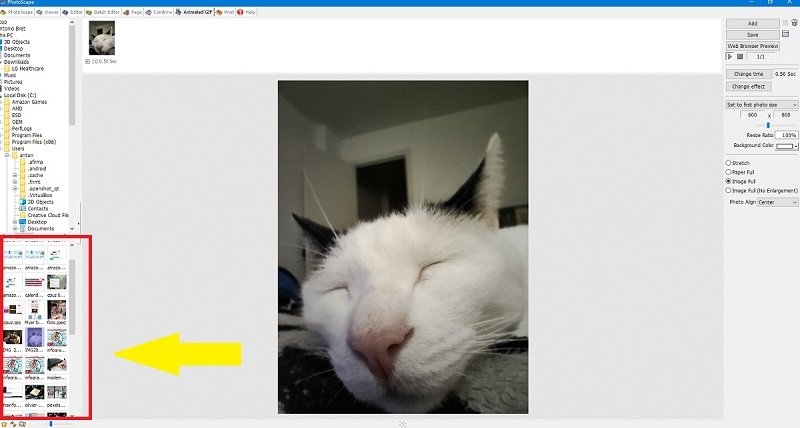 Choose a photo to create a GIF
Just select them and drag them to the central panel.
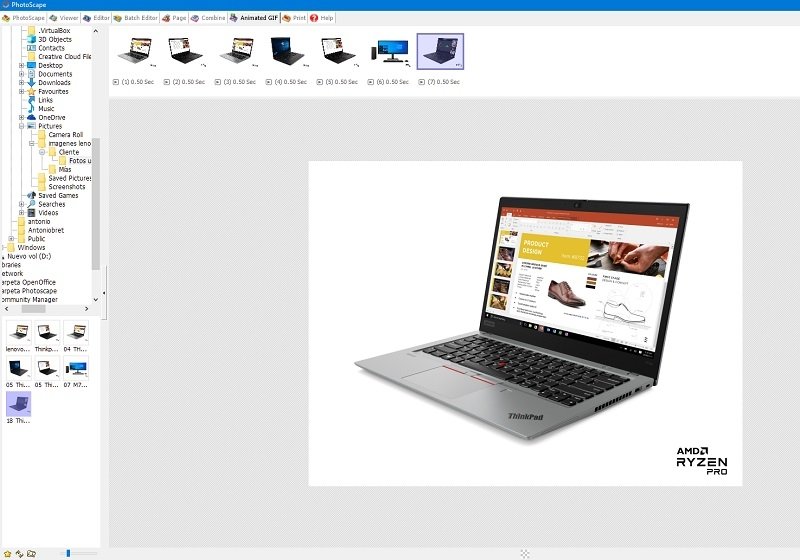 Select photos to be part of the GIF
By default, each image will be displayed for half a second. If we have placed all the photos in the central area, a video will appear with the images in order, a complete animated GIF. However, this can be changed. To do this, select the photo for which duration you want to change and double-click on the image.
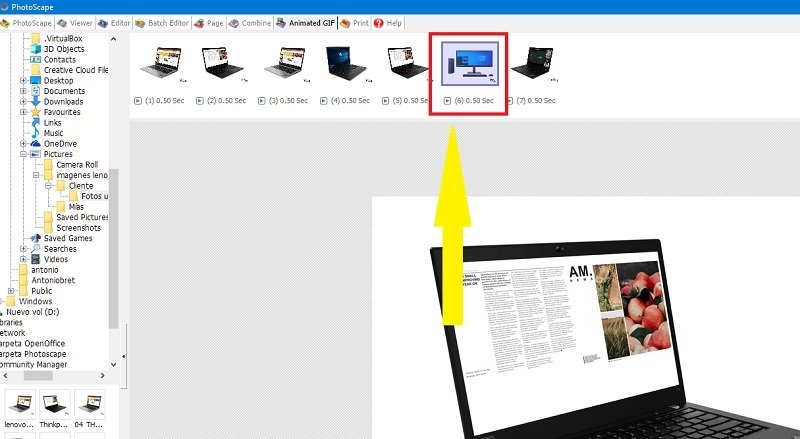 Change the time length of the image
Then, this dialog box appears, where we can set the duration of the frame.
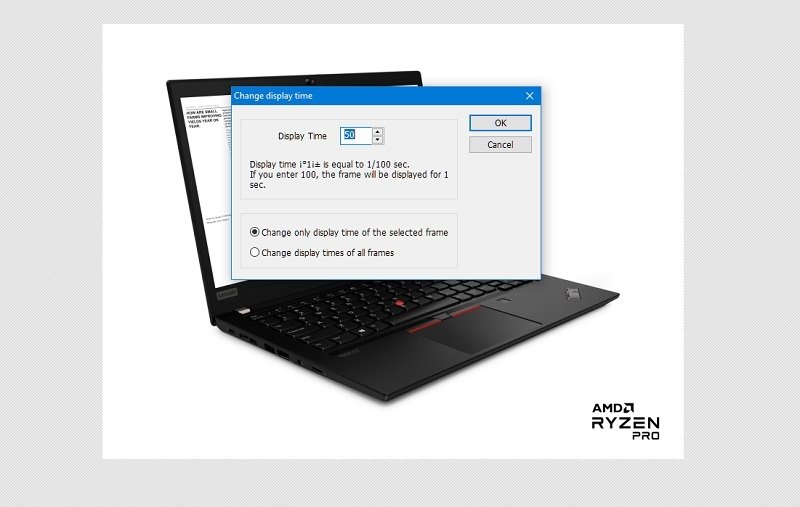 Choose the time length of the frame in PhotoScape
If we pay attention, we will see a small arrow at the bottom of each GIF image. If we click on it, we will have a wide variety of options to modify. We will be able to make this image appear with a lateral animation, from top to bottom, place it further forward or backward in the sequence, and so on.
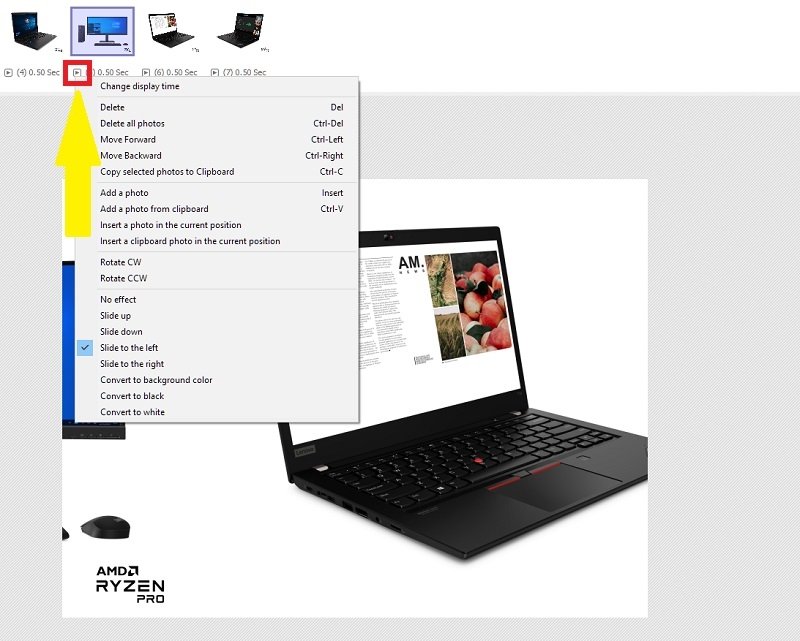 Options to modify the GIF
Now, all that remains is to save our work. To do this, go to the right side of the screen and click on Save. Write the name you want, choose the place where you want to save it, and that is all. Now, we have our animated GIF in PhotoScape.

