Microsoft Excel is an excellent program for issuing invoices. However, designing an invoice template from scratch can be quite time-consuming, especially if you want the calculations to be done automatically. Then, the easiest way to create an invoice is to use one of the templates that the application includes by default.
In the welcome screen, click on More templates.
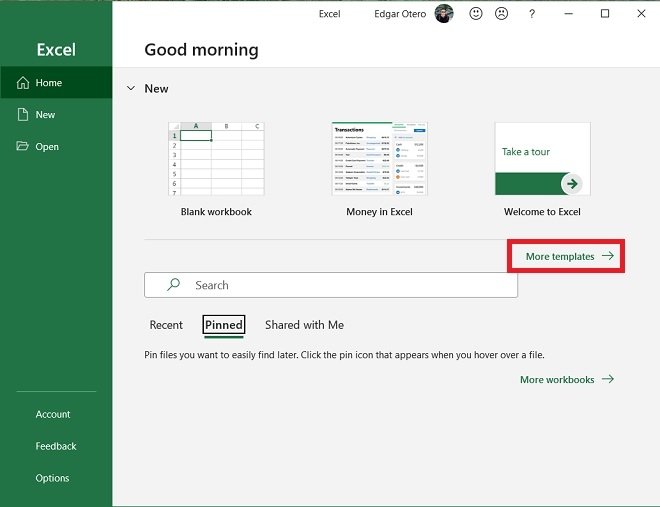 View templates
Use the search engine or browse the gallery to find a suitable template for our needs. As an example, we have selected Simple invoice. Double click on it to load.
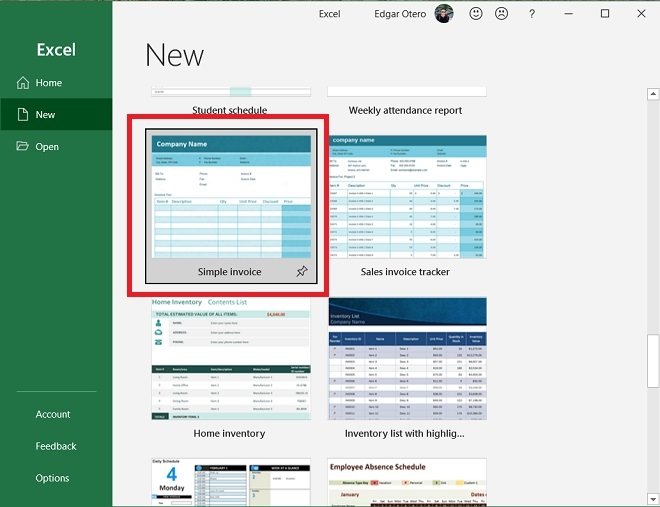 Open an invoice template
Start by modifying your company name at the top. If you wish, you can also add your logo from the Insert menu to give it a customized look.
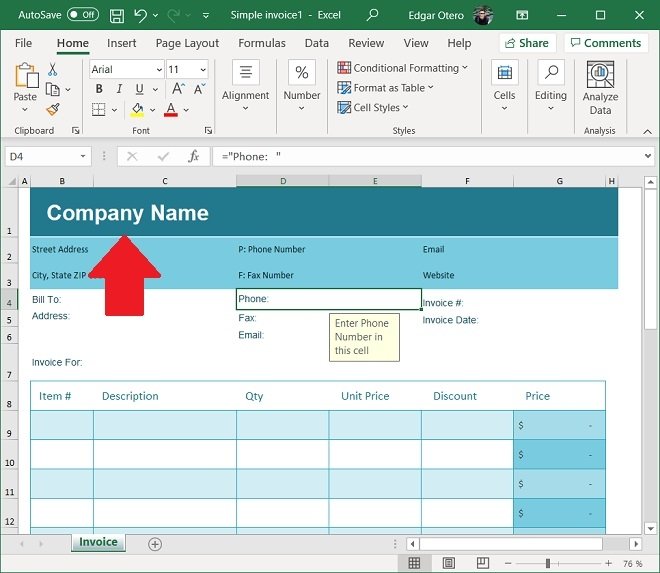 Change the company’s name
At the top, add your company data.
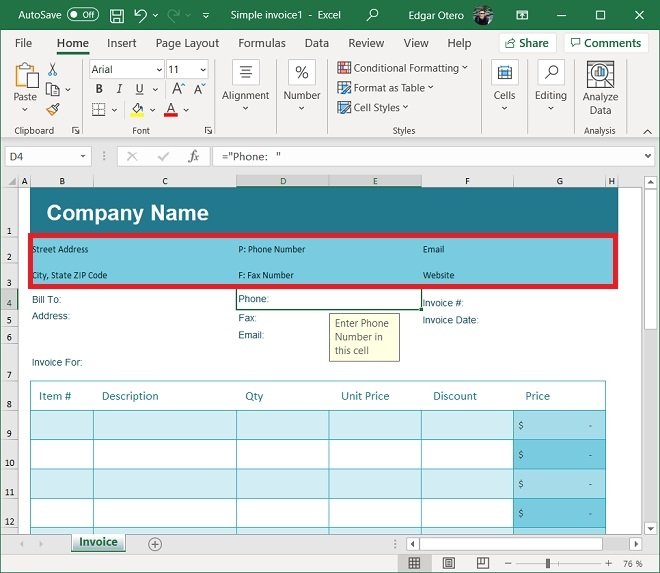 Details of the invoicing company
In the next section, enter the customer's data, i.e. the entity, company, or person you are invoicing.
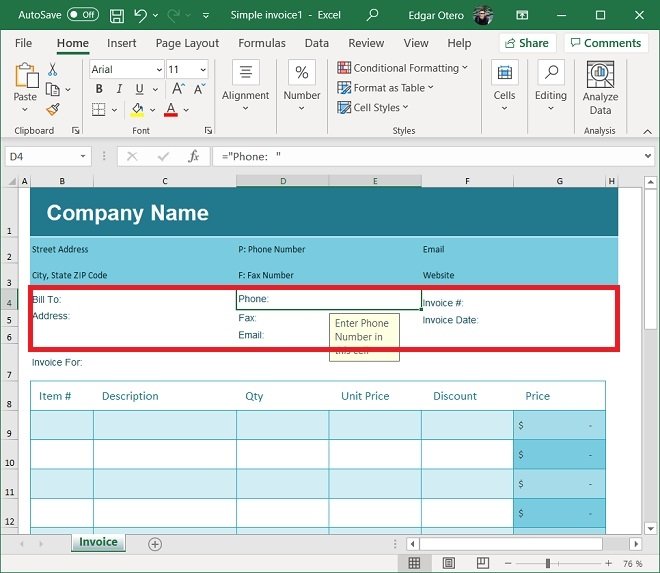 Debtor’s details
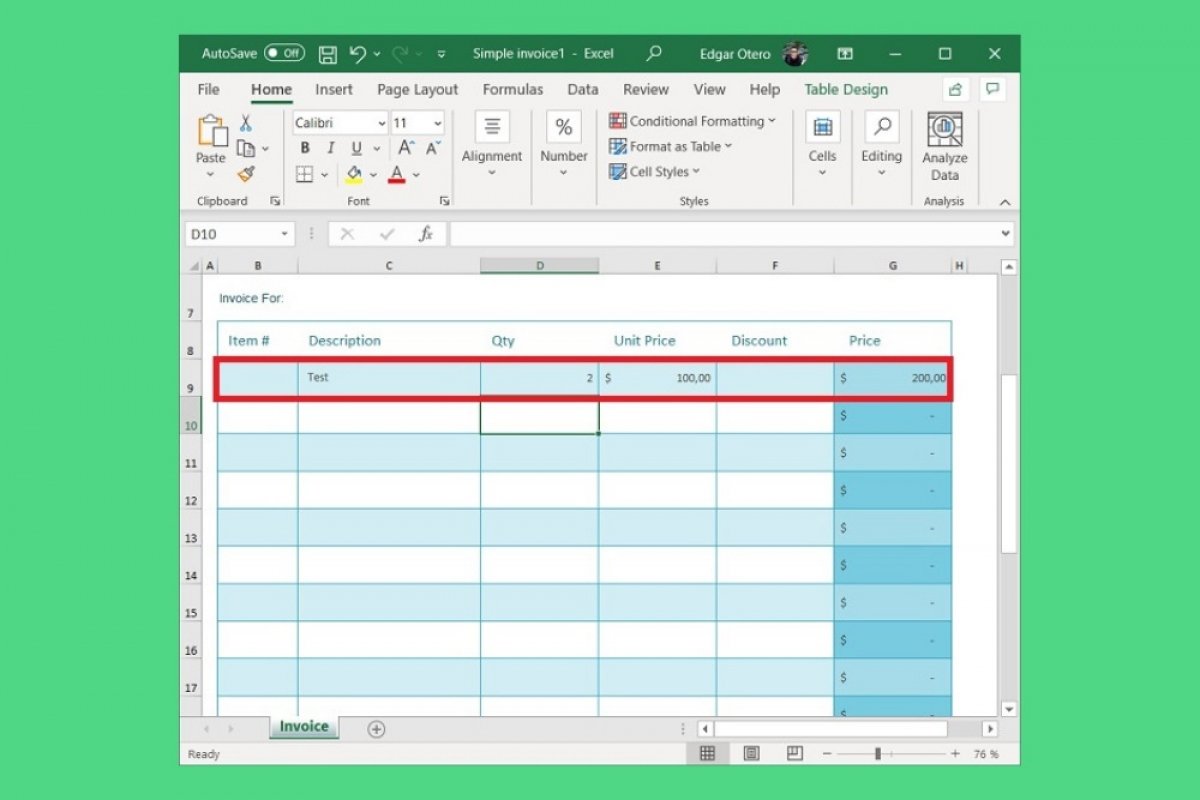
Now, it is time to list the products or services you wish to invoice. Enter the concept, the total number, and the unit price. As you can see, Excel will automatically calculate the total of each line.
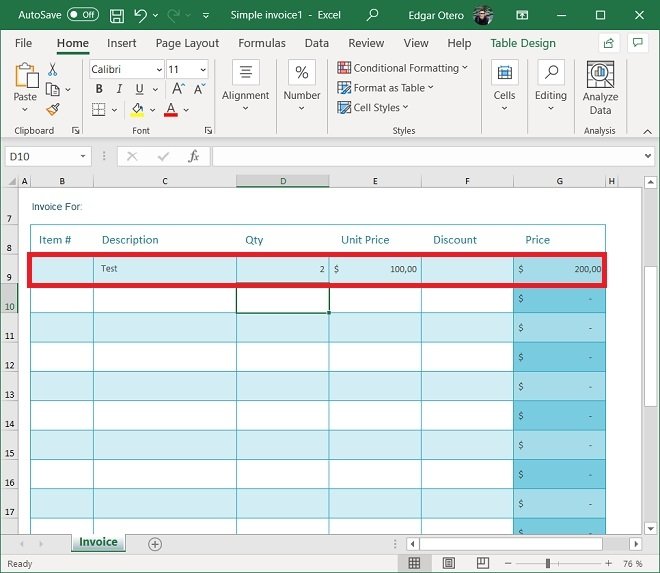 Invoicing line
The currency used in the invoices is set according to the region and language you have configured in Microsoft Office. However, to change the currency, just select the corresponding cells and click on Number. After clicking on the currency and banknote icon, choose the option that best suits your needs.
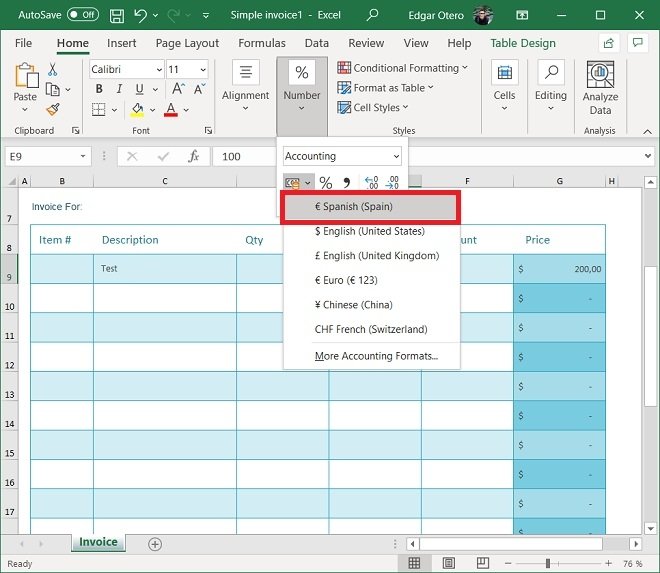 Switch currency
When you have finished, it is time to add the tax percentage. Click on the corresponding field.
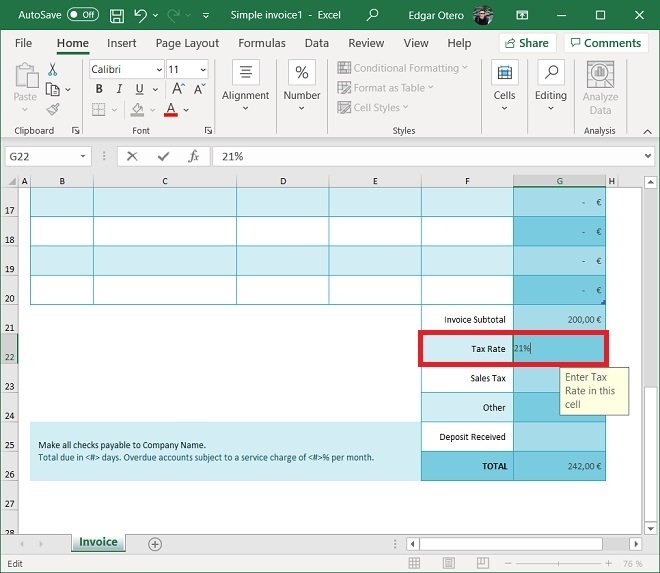 Add taxes
After doing so, the invoice will include the taxes in the total. You have now created your invoice. However, if you make lots of formatting changes, such as changing the currency, cell colors, or inserting a logo, it is recommended that you save the file as an Excel template. This way, you can use your custom design on future invoices. You can also use the default Excel template as many times as necessary.

