
Deleting your account in Windows 11 is very easy. You may consider deleting a user to delete all data associated with it. Or you may want to start from scratch without reinstalling the entire operating system. Whatever the reason you want to delete a user on your computer, here are the most effective methods.
Delete any user account in Windows 11
Let us start with one of the most common causes, the deletion of an account in Windows 11. You must be clear that with this process, you will be able to delete the following types of users:
- Local accounts which are not linked to a Microsoft profile.
- Accounts that are signed in with a Microsoft profile.
The first step is to open the system settings.
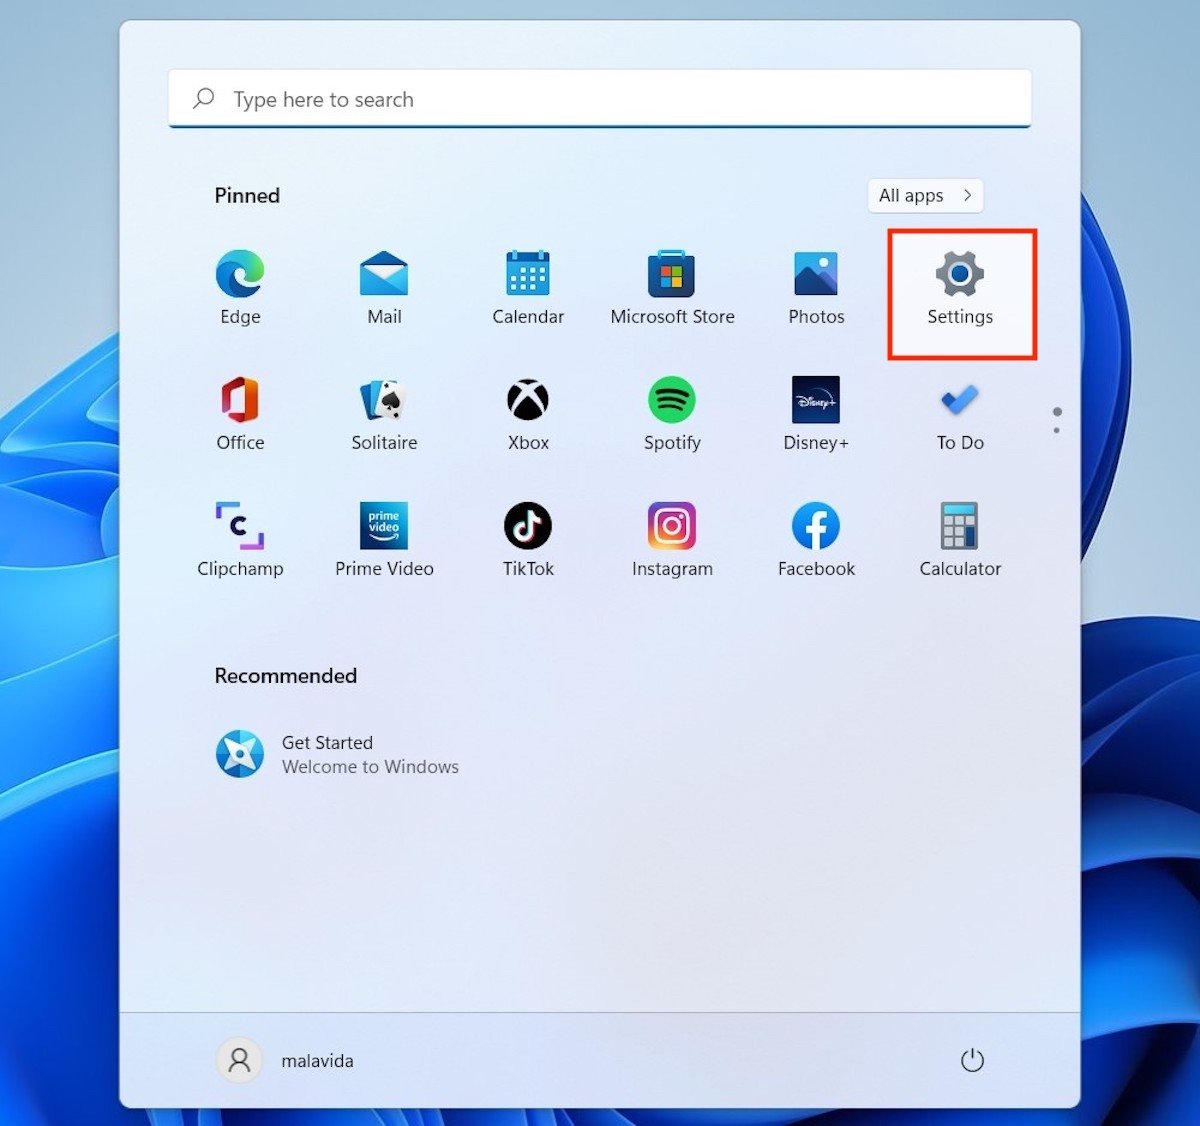 Open the Windows 11 settings
Then, go to the Accounts section. On the right side, you will see a series of options appear. Choose Family & other users.
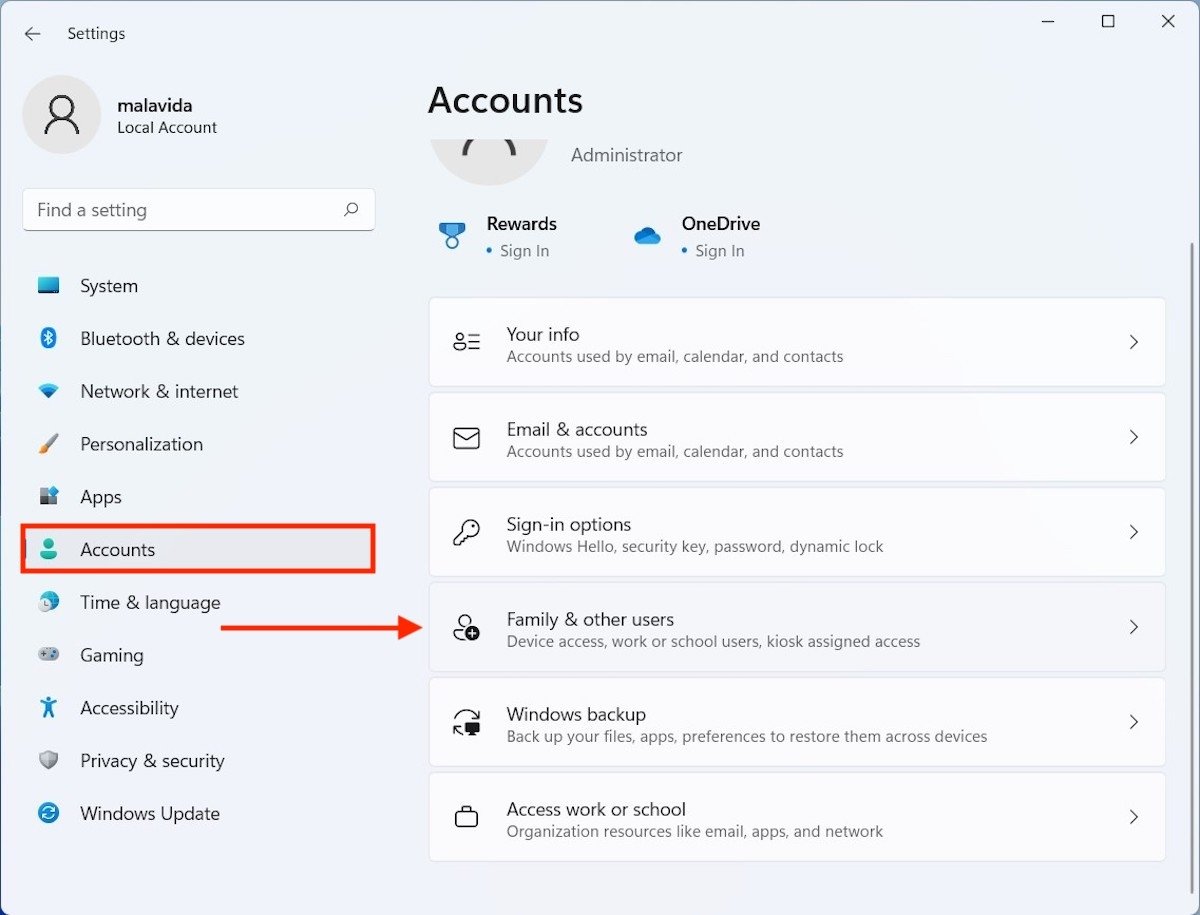 User options
Now, you are in the right place to delete any user account in Windows. However, it is time to ask yourself if you have a secondary account. If this is not the case, it is impossible to delete your current account because the team would be left without users. How can you solve this issue? If the account you wish to delete is the only one available, click on the Add account button.
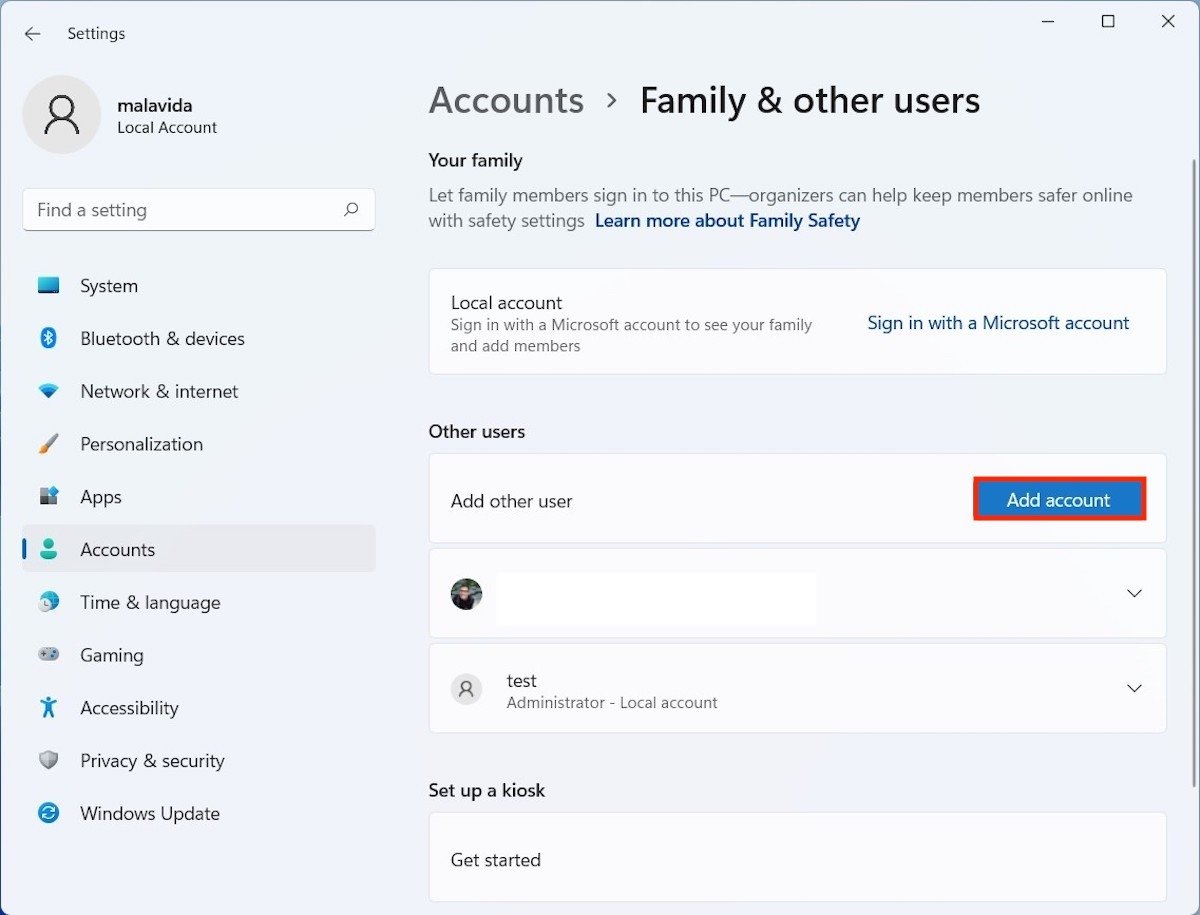 Add a new account
Do not enter any Microsoft account in the following window. Click on I don't have this person's sign-in information.
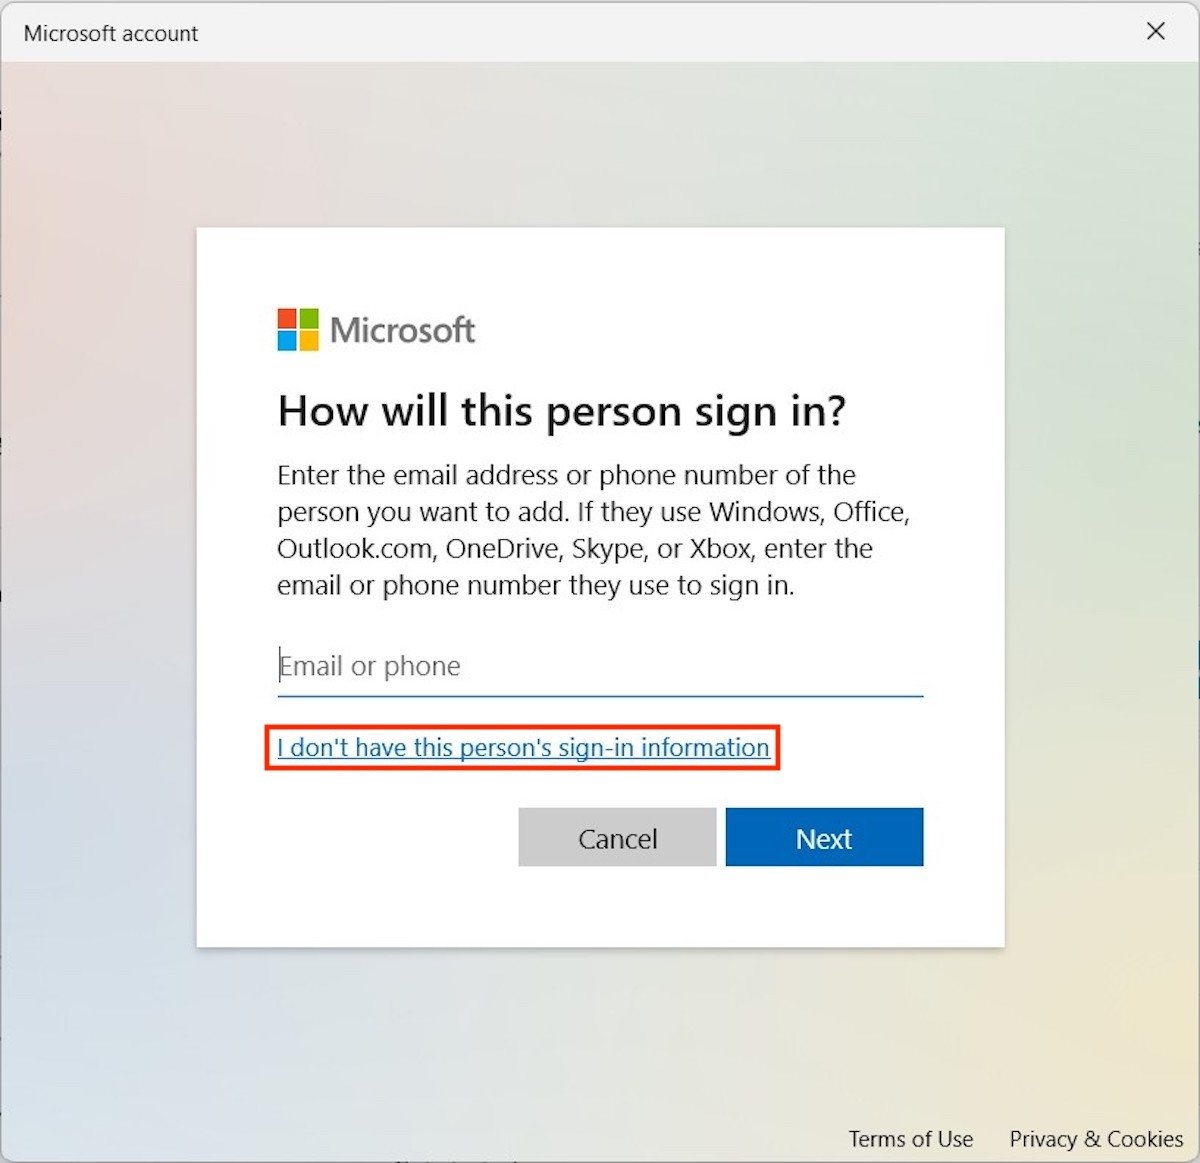 Add a local account
Again, avoid creating a new account with the Add a user without a Microsoft account button.
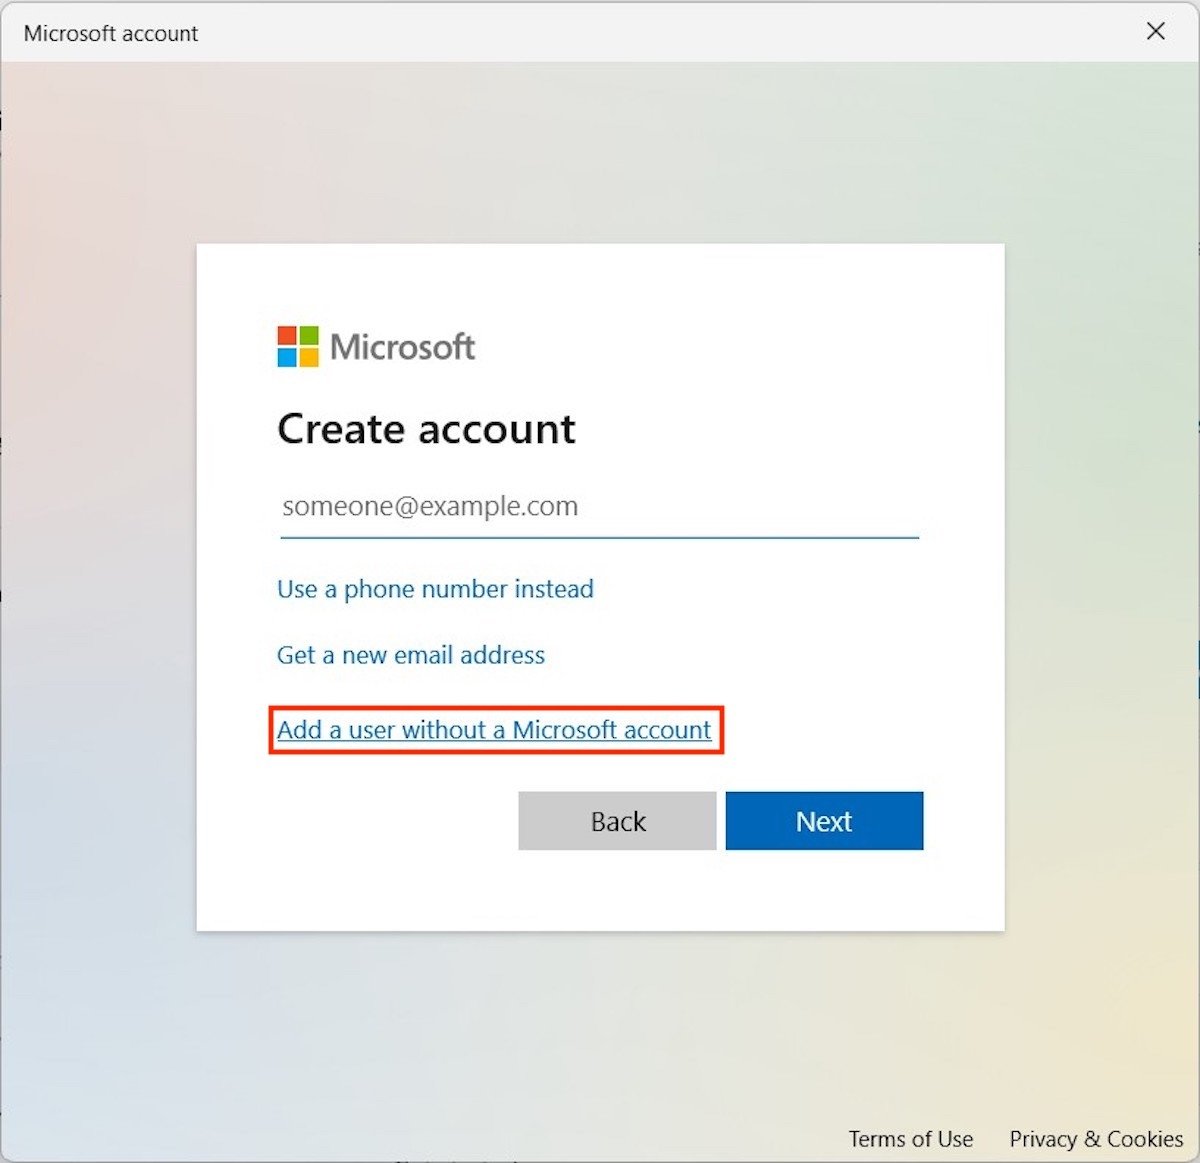 Add an account without a Microsoft profile
Specify the secondary account user name and password. Click on Next to continue.
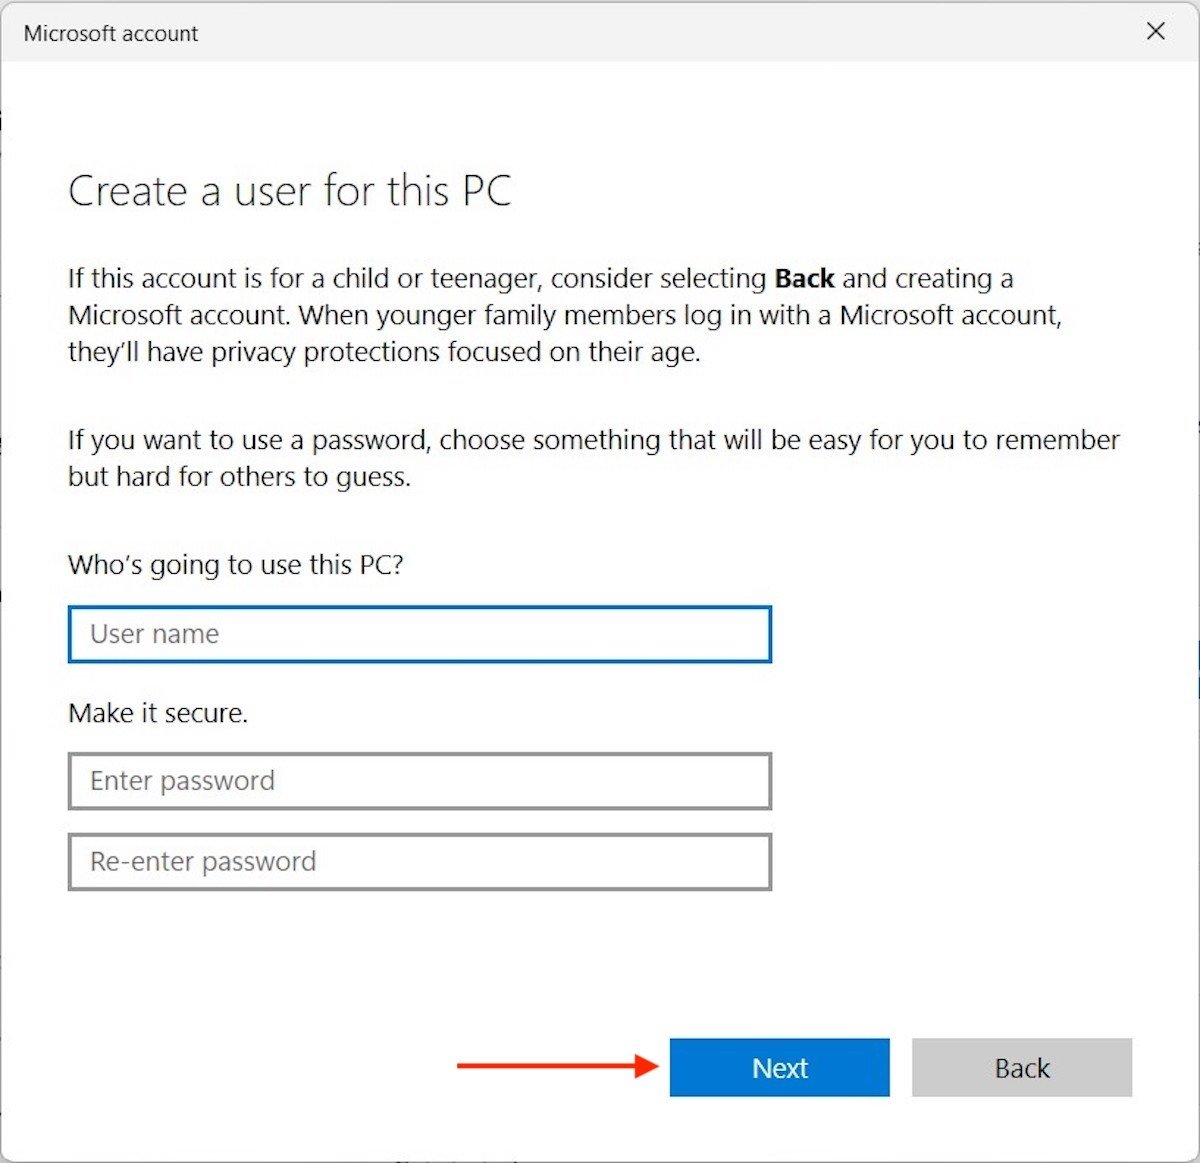 Fill in the account’s fields
Return to the Family & other users section. Open the options of the account you have just generated and use the Change account type button to assign it more privileges.
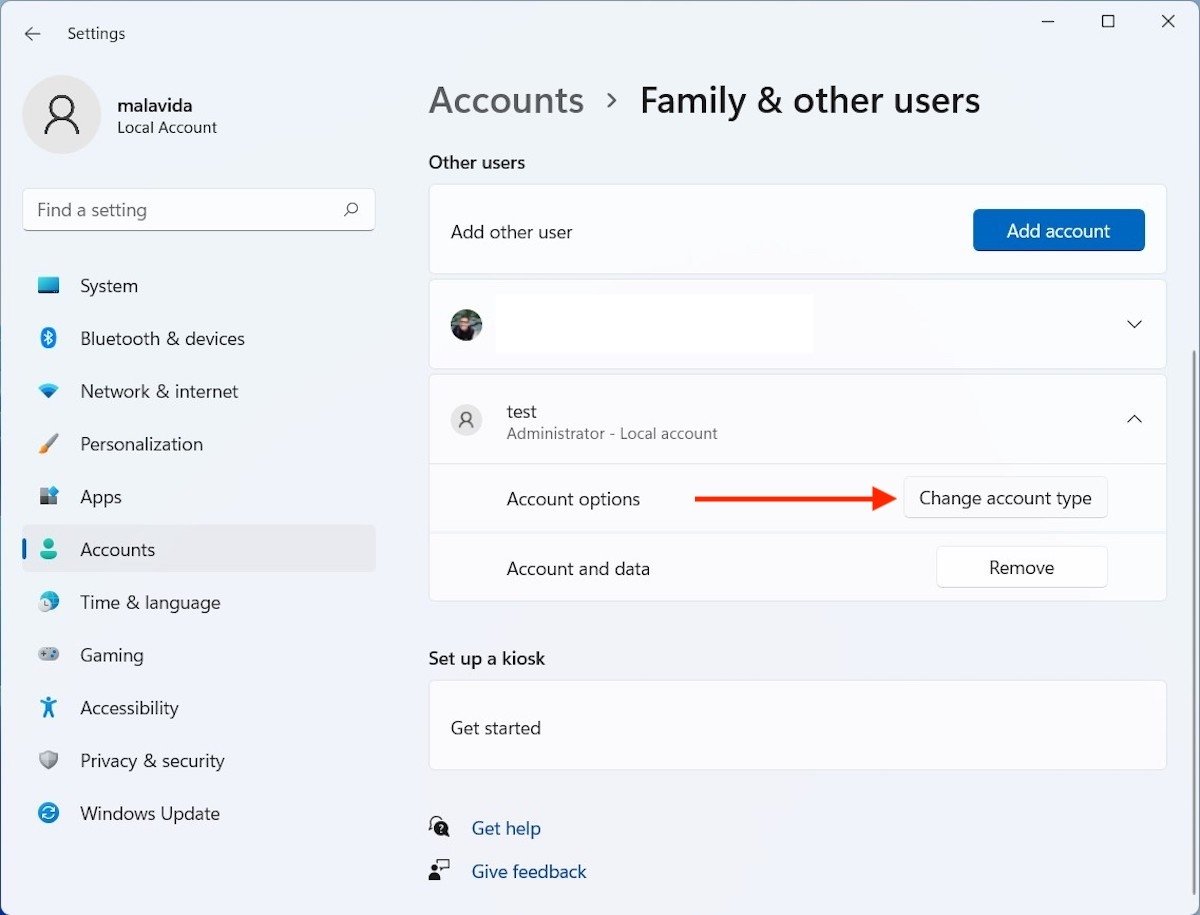 Change the type of account
In the dropdown Account type, choose Administrator.
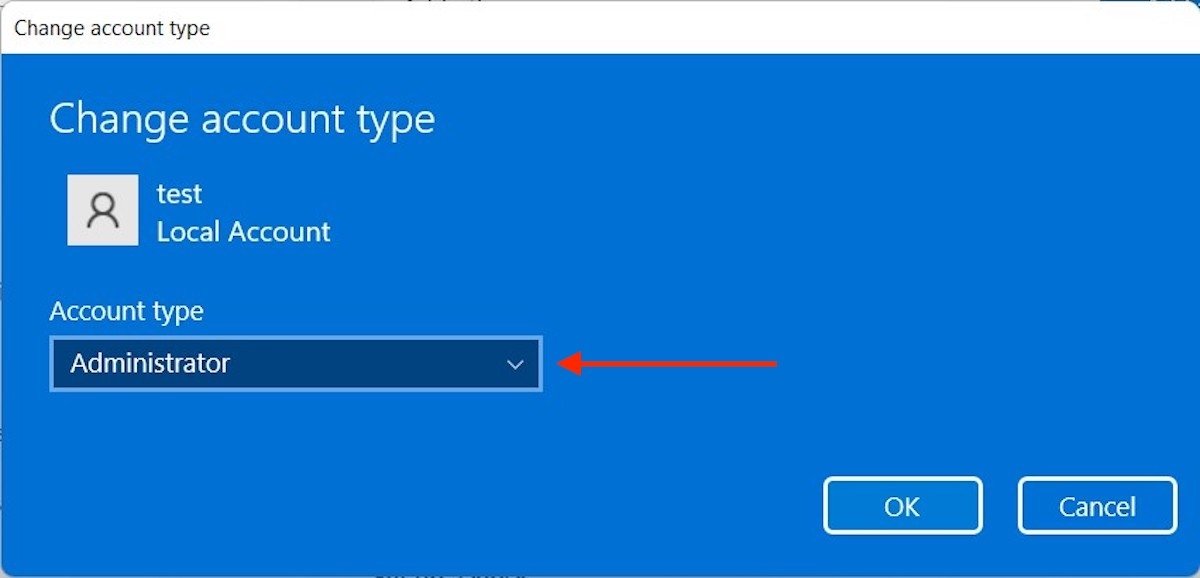 Give the account admin privileges
Before we continue, let's make a summary of what you have done so far:
- You accessed the user settings.
- As you did not have any additional accounts, you generated one.
- Finally, you assigned administrator privileges to be able to delete users.
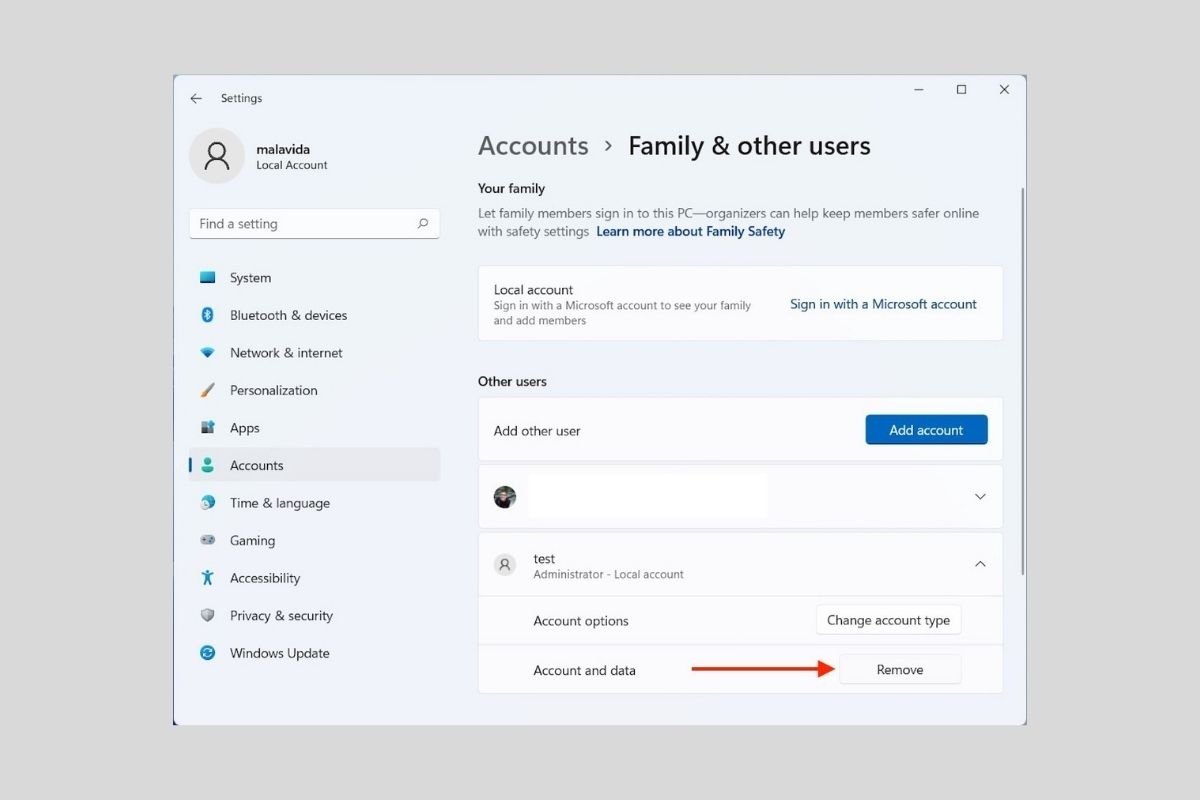
Now, log out and go to the same section from the new account you have enabled. Click on the arrow to see all the options for the user you wish to delete. Click on Remove to proceed.
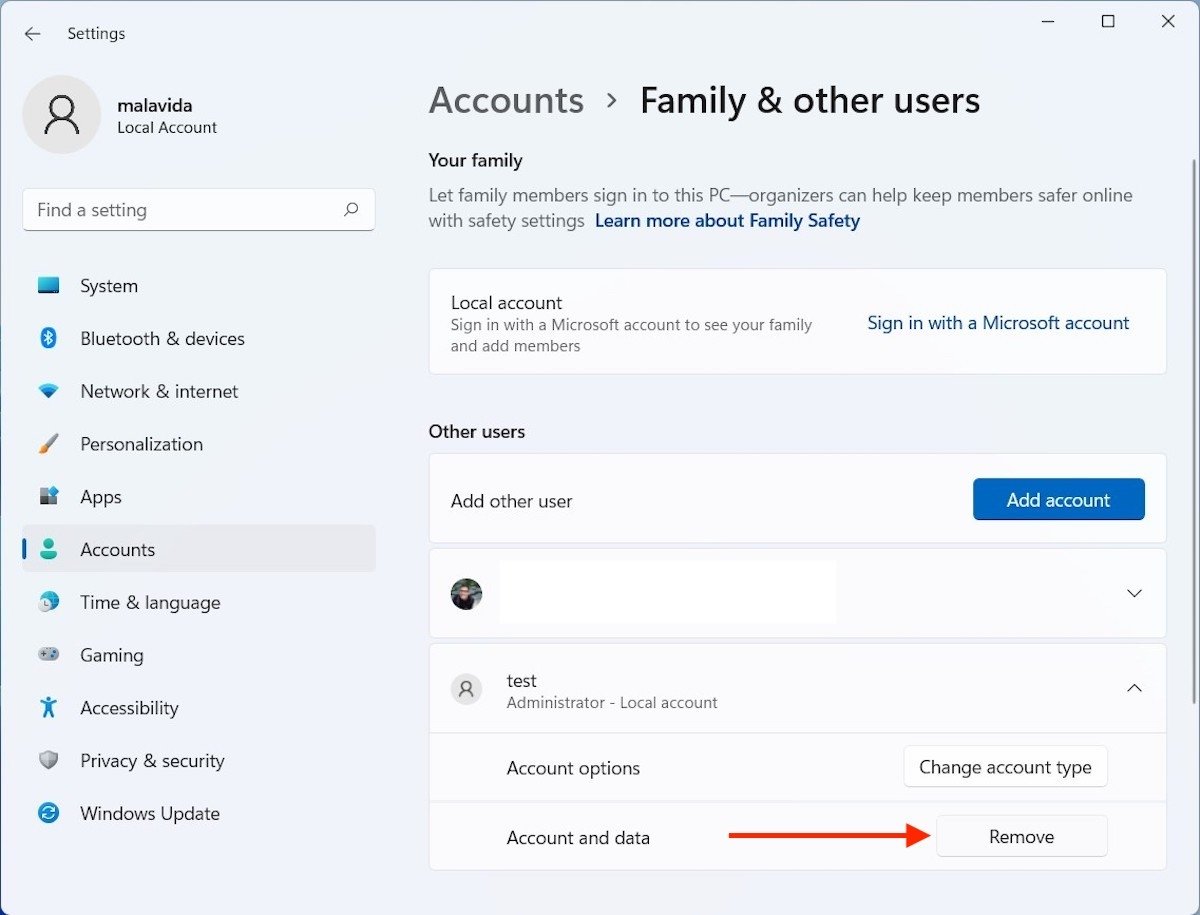 Remove the user account
In the pop-up dialog, click on the Delete account and data button.
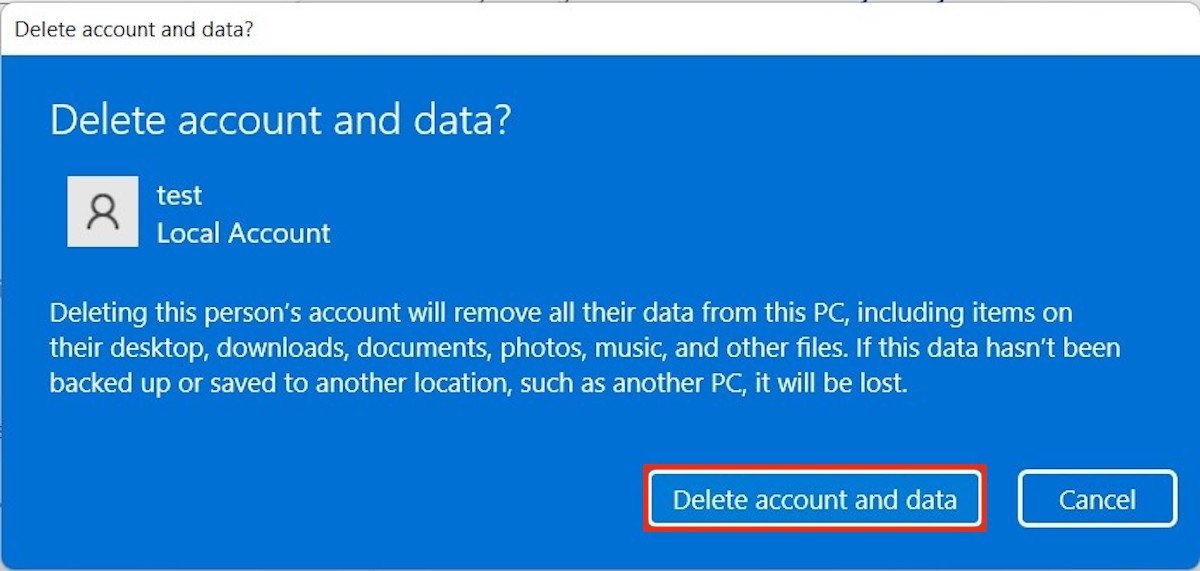 Confirm the deletion
The user will have been completely depleted, and along with it, all its data and applications.
Delete Microsoft account and switch to a local account
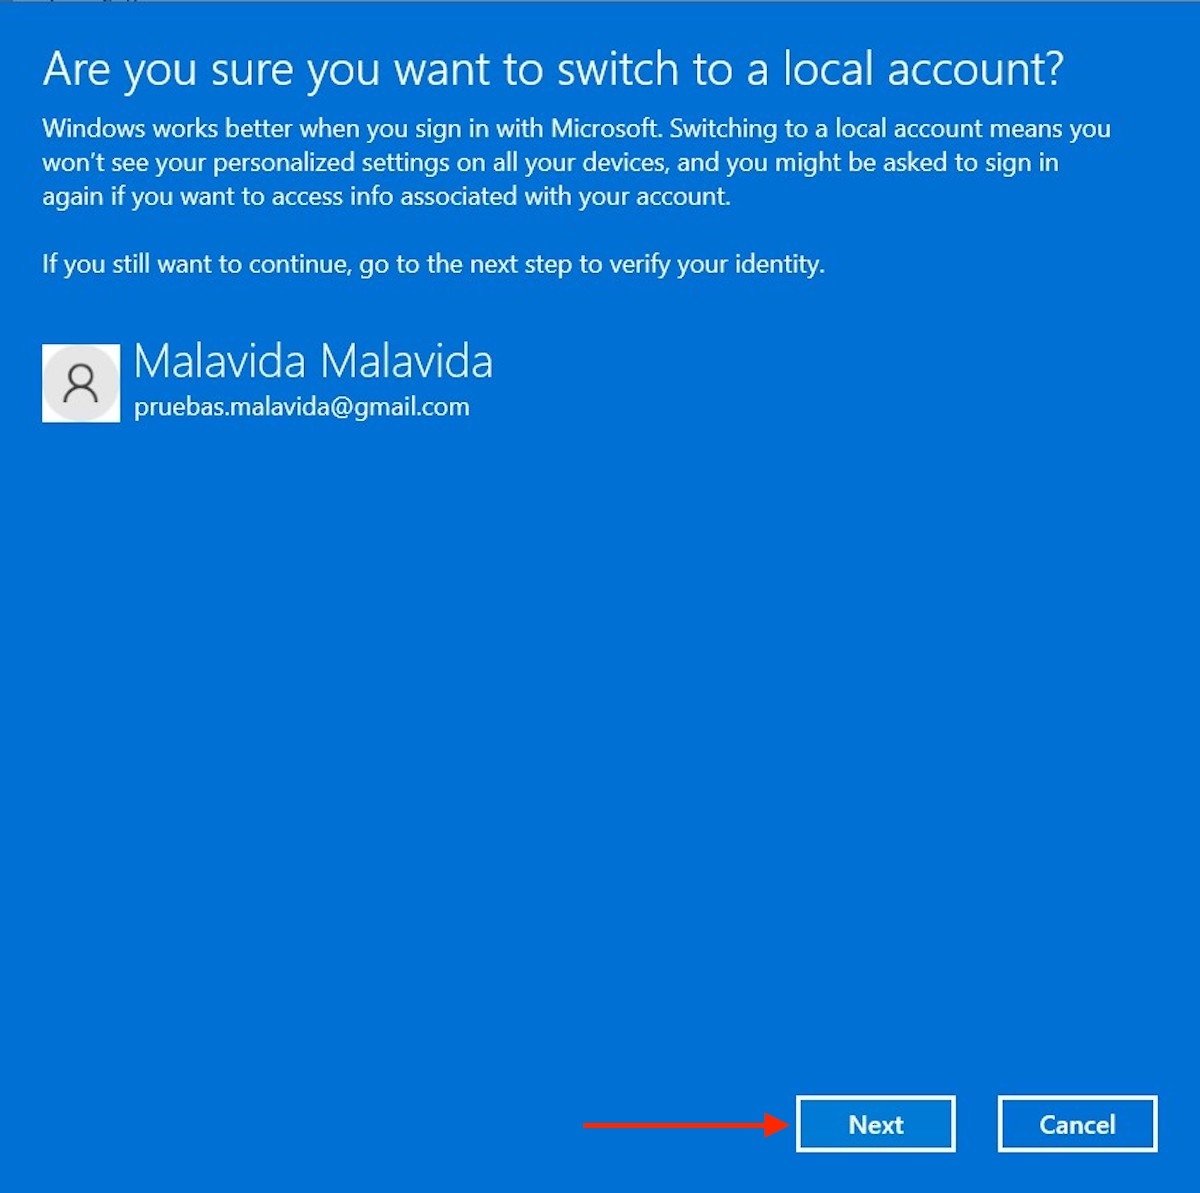
The second case we focus on in this guide is to delete a Microsoft account and unlink it from a user. Unlike the previous process, this one does not delete the files of the user. Just log out of the services of the company. An additional account is not required.
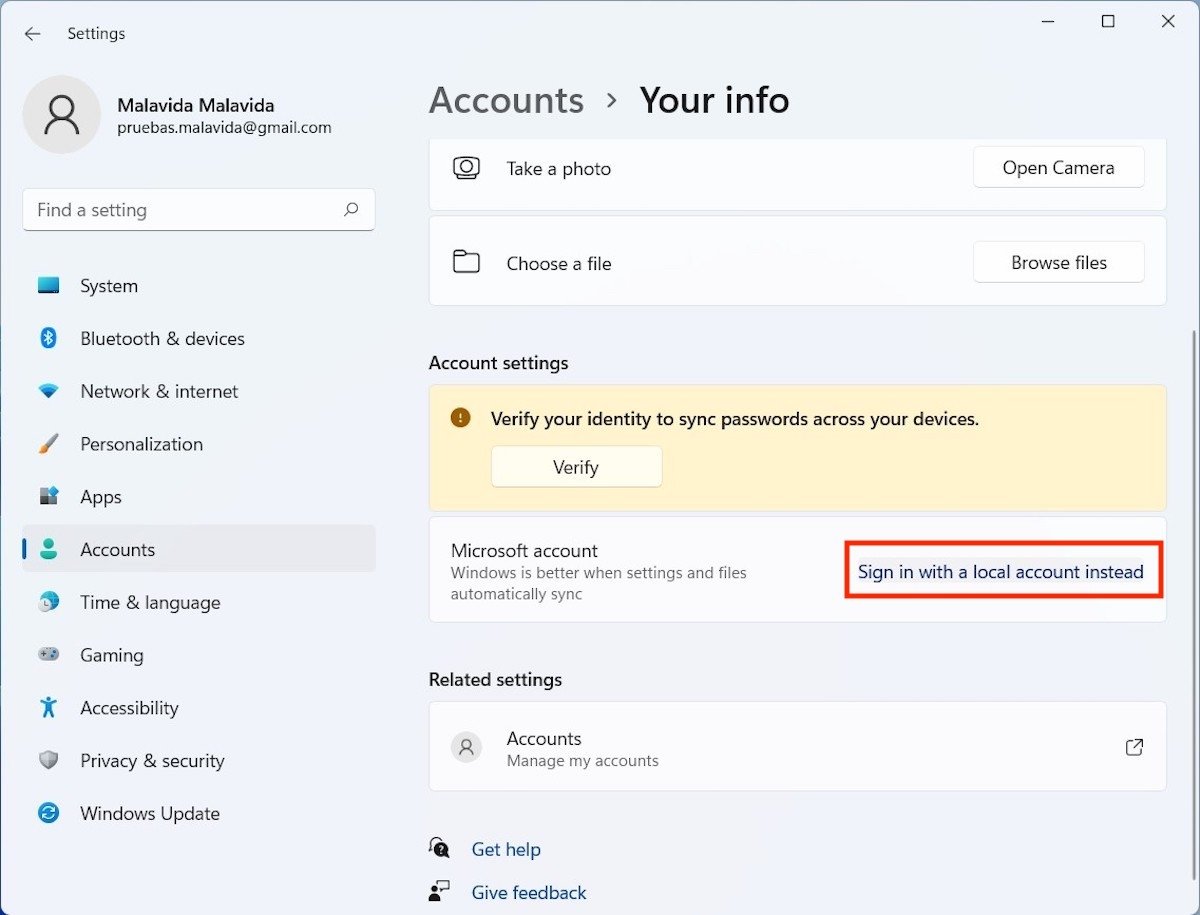
Again, it all starts in the settings application. Open Accounts and click on Your info.
 Account information
Click on the link you will see next to Microsoft account named Sign in with a local account instead.
 Remove the Microsoft account
A wizard will appear on the screen to help you complete the unlinking process. Use the Nextbutton to start.
 Confirm the deletion of the Microsoft account
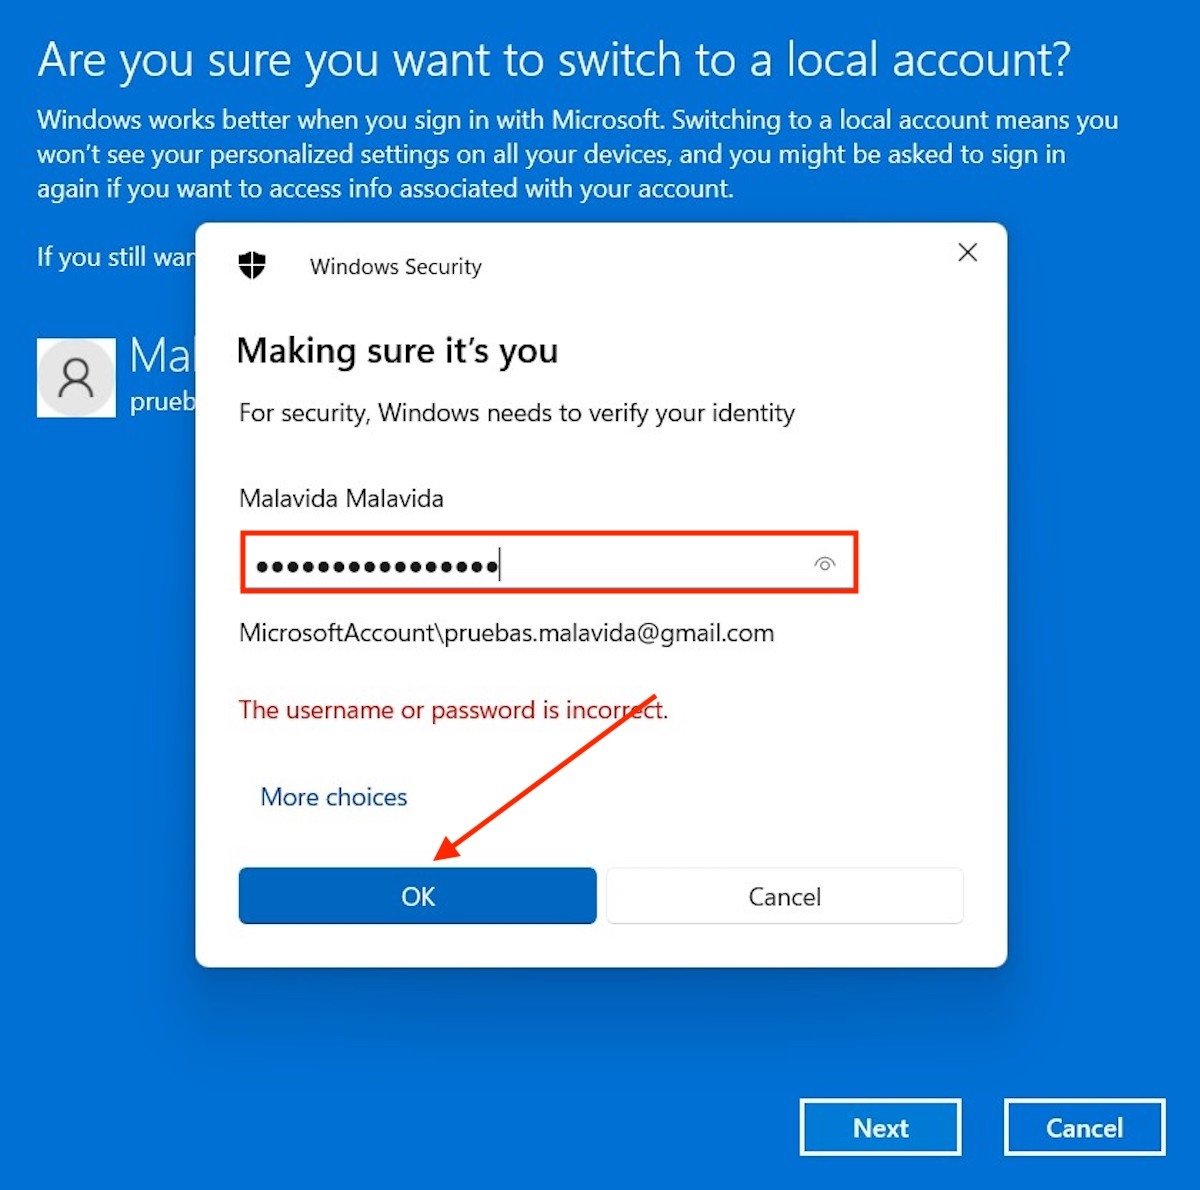
Enter your Microsoft account password and click Ok.
 Identification by means of the Microsoft account keyword
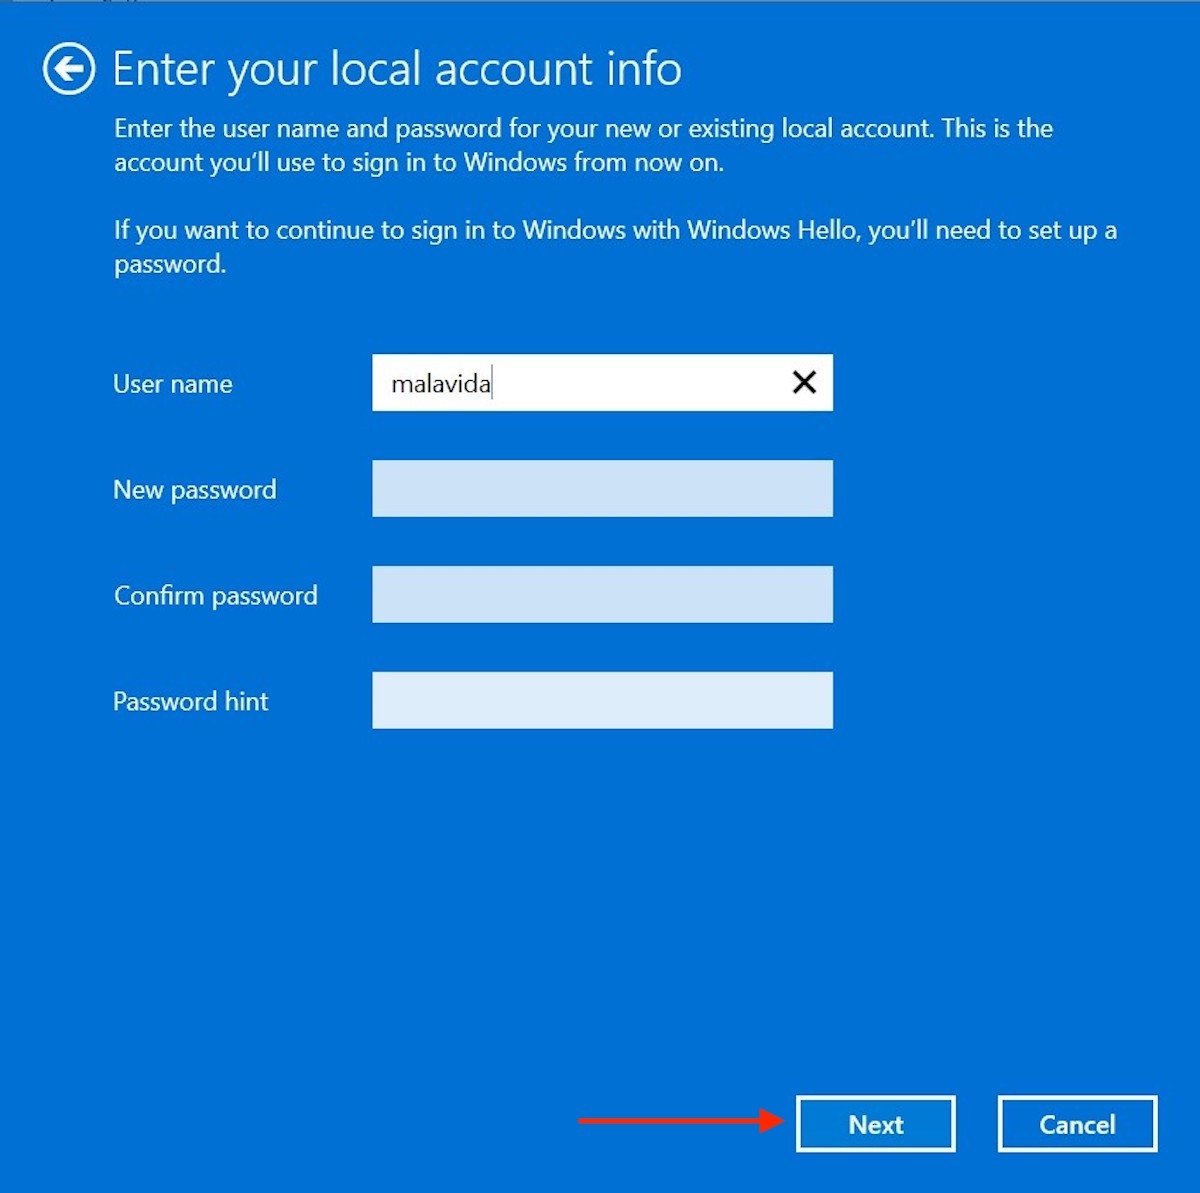
It is time to add the necessary information to your local account. Indicate the user name and password you wish to use from now on. Click on Next.
 Create a new local user
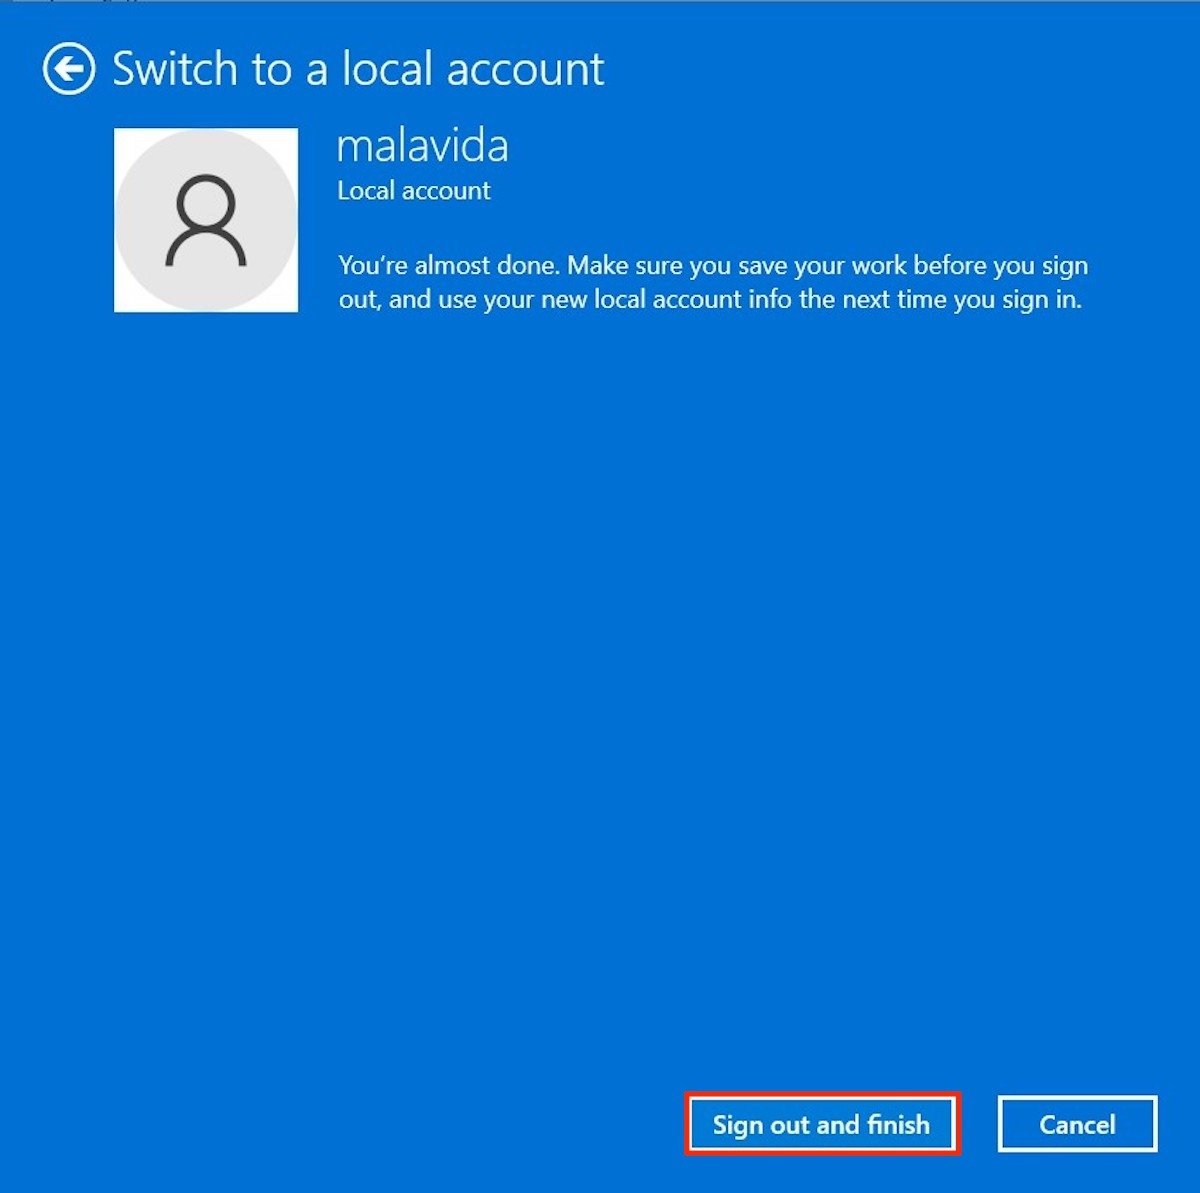
And that is it. You have already removed the Microsoft account from your computer. You now have a local user that is not linked to the online services integrated with Windows. The last step is to click on Sign out and finish. Your session will be closed and you will have to log in with your new password.
 Log out and complete the process
To check that everything is OK, open the system settings and look in the upper left corner.
 Confirm the creation of the local account
Where your email associated with your Microsoft profile used to be displayed, the Local Account identifier now appears.
