In this guide, we tell you all about BlueStacks. First, let's talk about what exactly this application is and its main functions. Also, we show you how it works, the initial steps you must take to properly set it up, and the differences between this version and BlueStacks X. All the information you need about this excellent Android emulator is here.
What is BlueStacks, and what is it for
BlueStacks is a virtualization platform that lets you have an Android device inside a PC or a Mac to run applications and games of this smartphone operating system. However, we must mention that although BlueStack can download any app from the Play Store or install it through an APK file, it is mainly a gaming platform. What does this mean?
Although you can use BlueStacks to browse Facebook from its Android app or send an email from the Gmail Android app, its main purpose is to run Android games. It should be noted that most of the current games are developed specifically to run on this operating system. This significantly limits the user, as they can only play certain games from a tablet or smartphone. Thanks to BlueStack, that limitation disappears because its environment adapts these titles to the gaming experience of a desktop computer.
Currently, this tool is part of Now.gg, a cloud-based video game portal that lets you play games from your browser without installing additional software on your computer. As we will see below, this detail is important, as it led to the creation of two versions of BlueStacks. As of today, this emulation platform is free, and we are not aware of any plans to start charging users for it.
How BlueStacks works
If we focus on the more technical side, BlueStacks works through virtualization. That means it is similar to VirtualBox (it seems to use its technology) or any other virtual machine platform. In a nutshell, this application establishes a suitable environment to run Android on your computer. In other words, it is responsible for the software simulation of a physical device with all its necessary hardware components.
Thanks to that, it can run a smartphone operating system, such as Android, in a window of your computer. In fact, on most occasions, when you start BlueStacks, the message "Tablet is starting up" appears. For the operating system, this platform is just like any other device.
From the user's point of view, BlueStacks works as just another program, although inside it, you will see an application launcher. Here, you can access all the apps installed on the virtual device.
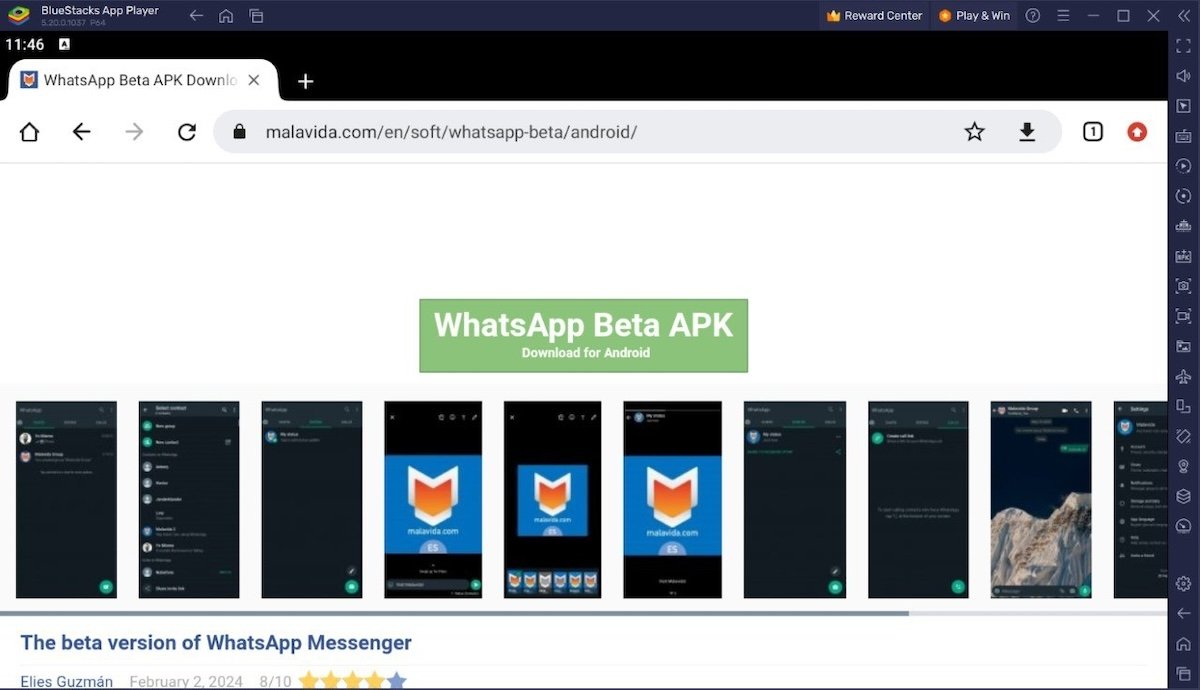 Chrome for Android running in a BlueStacks window
Just click on any of them to run it on your computer. It even comes with preinstalled apps, like the Play Store or the Chrome browser. This is what they look like once they have been run on the virtual device:
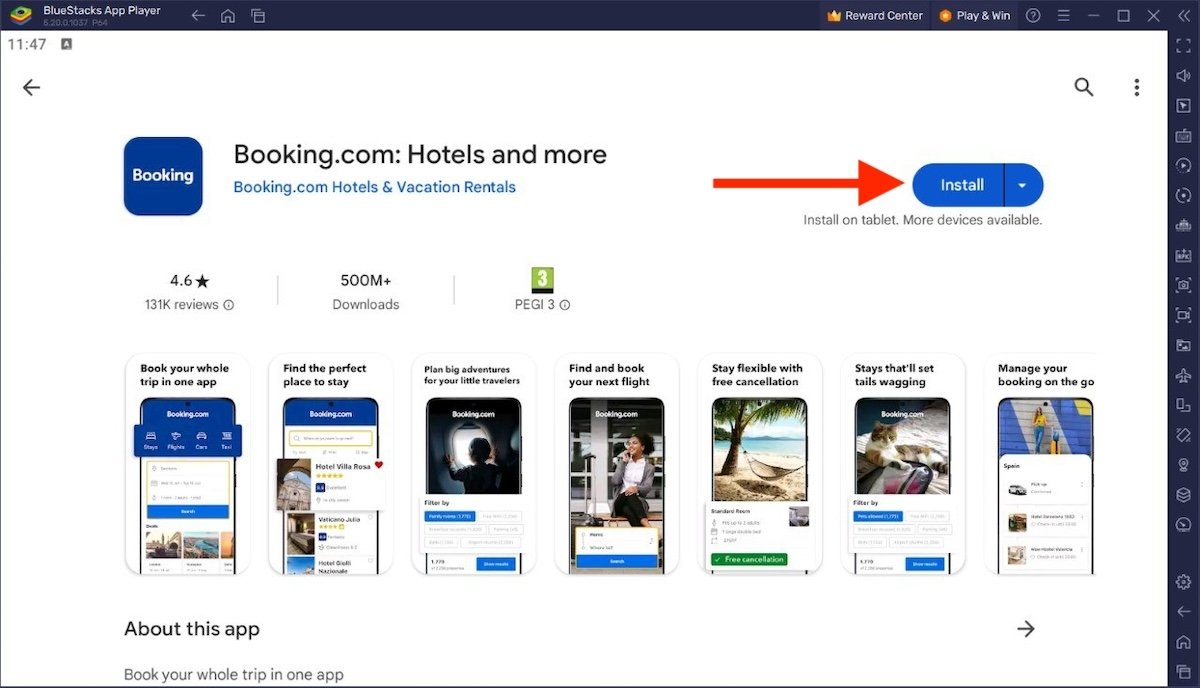 Installing an app from the Play Store in BlueStacks
In BlueStacks, you can install applications in two different ways:
- From the Play Store. You must first log in as if you were using any Android device. After this, you can download games and apps as you normally would. Something to consider is that, as the store is associated with your profile, all the games and apps you have purchased from your smartphone will be available to you.
- From an APK file. You can get the APK file of the app you want from a trusted repository (such as Malavida). You can download it directly from BlueStacks through the integrated Chrome browser or import the file from Windows. In the latter case, the emulator has an integrated tool for sending and receiving files from the PC. However, you can also drag the APK to Bluestacks' window to start the installation.
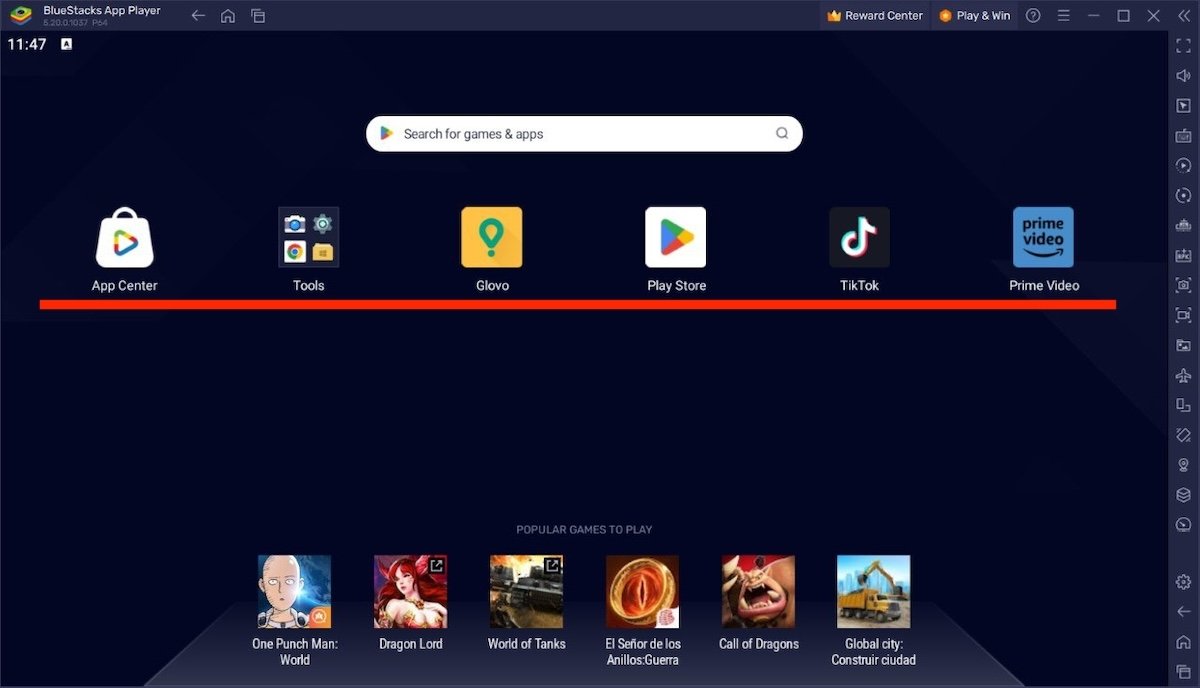 BlueStacks app launcher with all the installed applications
Once installation is completed, the application will appear in the application launcher on the main screen. In addition, a shortcut to the app will be added to the Windows desktop, allowing you to launch the Android apps you have installed on the emulator faster.
How to configure BlueStacks
Now, let's answer another common question: How do you configure BlueStacks? First, you will be thrilled to know that Bluestacks is a plug-and-play software, meaning you can start using it as soon as you install it. Its default settings already let you install applications, log in with your Play Store account, and play your favorite games.
As you can imagine, not all titles work in the same way. Some require touch gestures, some are compatible with external controllers, and others can be controlled with keyboard shortcuts. For this reason, Bluestacks offers options to customize the user experience and adapt the emulator to each game or application.
But first, you should familiarize yourself with the quick functions on the right side of BlueStacks. They are organized in a toolbar in which you will find, among other things, the necessary commands to take a screenshot, install an APK, shake the device, or change its orientation. In other words, in this area, you will find most of the actions you can do with a physical device.
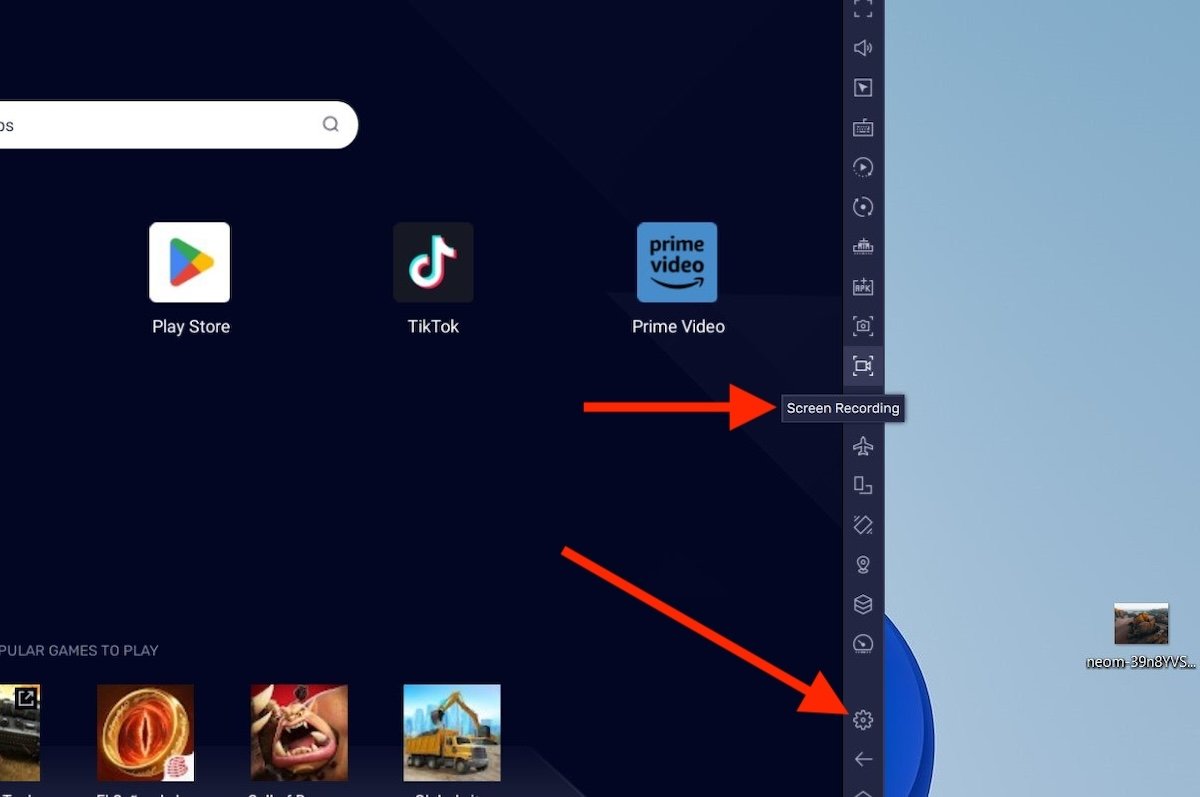 BlueStacks toolbar with all the quick commands
Additionally, at the bottom of the sidebar, you will find the Home and Recent Apps buttons. You can also activate the Back command. Finally, unsurprisingly, you will also see a shortcut to BlueStacks' settings, represented by the typical cogwheel or gear icon.
If you click the settings button, you will access a broad list of parameters you can modify. However, you must know there is a difference between BlueStacks and Android settings. As if it were a physical device, you can access the Android settings from the main launcher or home screen. The BlueStacks configuration panel features settings related to the emulator behavior. On the other hand, the Android settings app lets you change the language of your virtual device, manage your Google account, and more.
For now, let's focus on the BlueStacks settings. The first one we will see is Performance. From here, you can change the settings related to the hardware resources available for BlueStacks. For example, it is possible to allocate more cores or more RAM. Also, several performance modes alter the behavior of the emulator.
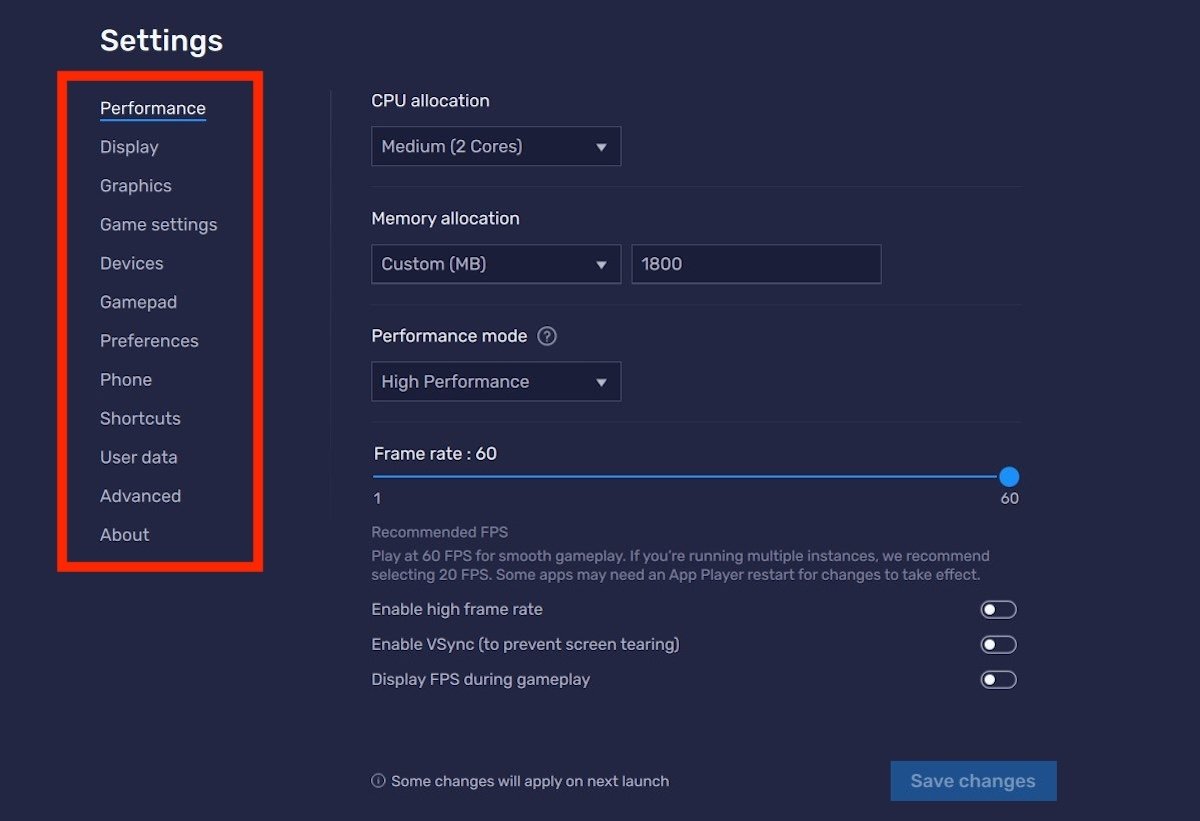 Performance section and the rest of settings sections
Another important section is the Gamepad section. You must go here to enable gamepads or game controllers and let apps use them. You can even make the emulator trigger the controller's vibration function.
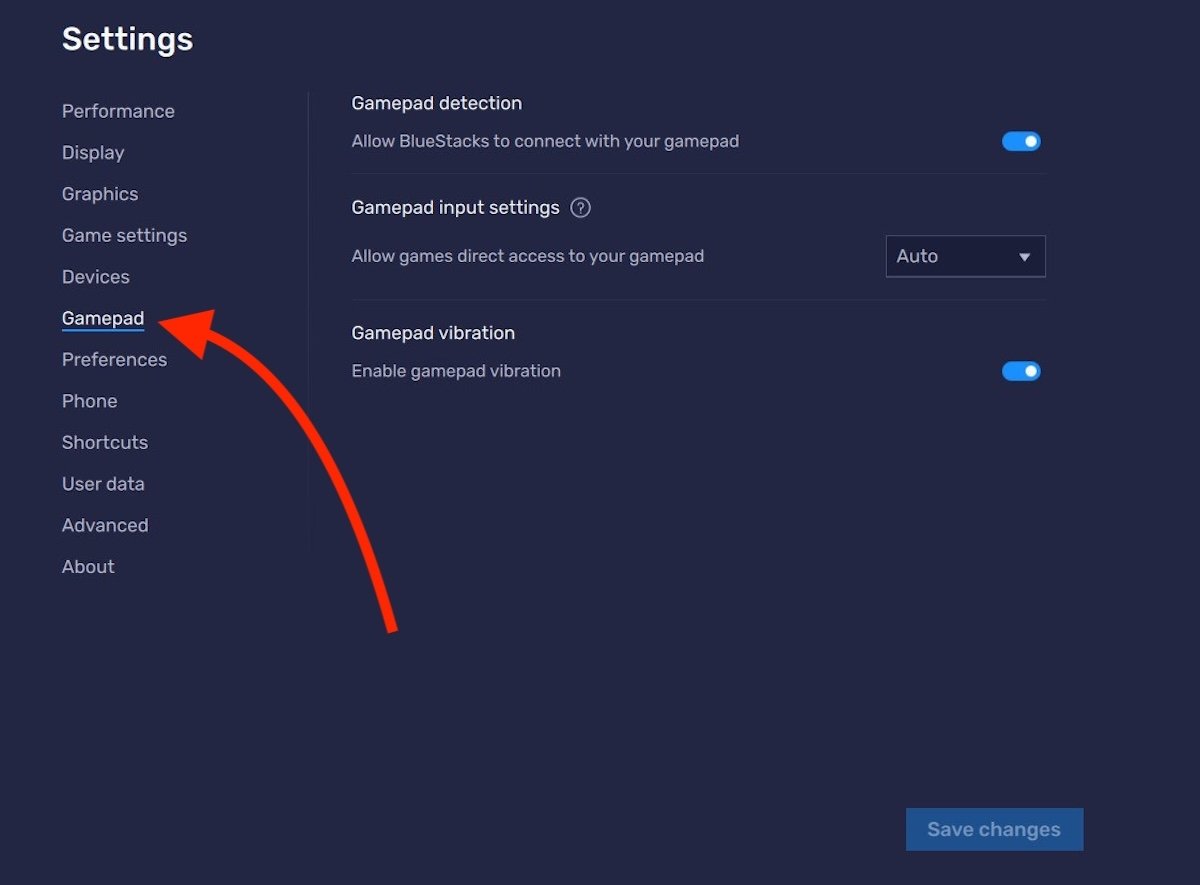 Settings for external gamepads in BlueStacks
Finally, we want to highlight a third section within the Bluestack's settings: The Shortcuts. Here, you can customize keyboard shortcuts for most BlueStacks actions. Don't forget you can always return to the default settings by clicking on Restore defaults.
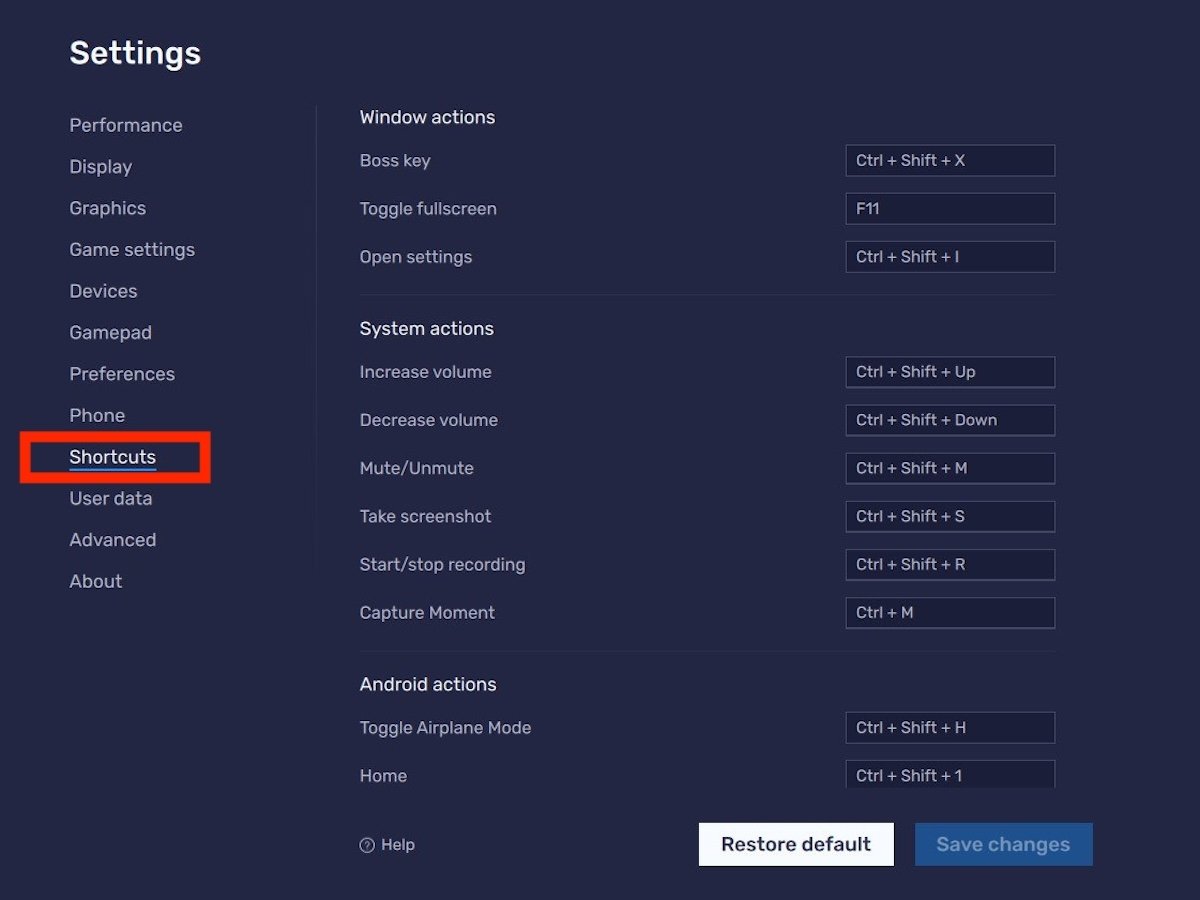 Keyboard shortcut settings
Besides these three sections, in the emulator configuration, you will find these other sections:
- Display. Display configuration: change the DPI, device orientation, and resolution, among others.
- Graphics. Graphics-related settings: rendering system, GPU usage, and others.
- Game configurations. Activation of full-screen view.
- Devices. Selection of default speakers, as well as microphone and camera.
- Preferences. Here, you will find some convenient settings, such as linking BlueStacks with Discord or the behavior of the ESC key.
- Phone. It allows you to choose the device and network profile. For example, you can ask the emulator to act as a Galaxy S22 connected to the Movistar network.
- User data. Includes a data wiping tool to reclaim storage space on your computer. It also helps you create a backup copy of the virtual device.
- Advanced. Other advanced settings, such as enabling ADB connection.
Now that you know BlueStacks' settings in depth, it will be easier to modify the emulator's behavior to suit your preferences and the games and apps you want to run on your PC or Mac.
What is BlueStacks X: comparison and differences with BlueStacks
The last question we will address in this guide is: What is the difference between BlueStacks X and BlueStacks 5? First, you should know that BlueStacks X is now known as BlueStacks 10, at least if you download it from the official website. There is a notable difference between the two options: the kind of games they prioritize.
On the one hand, there is BlueStacks 5, which is the program we have described in this guide. As we told you above, it is an emulator capable of running Android applications and games. All of them are downloaded to your computer (inside the virtual device, obviously) and run on your computer's hardware resources. The appearance of this version is similar to that of a virtualization platform. In other words, the Android interface is displayed inside a window on your computer, and from there, you can interact with the virtual device.
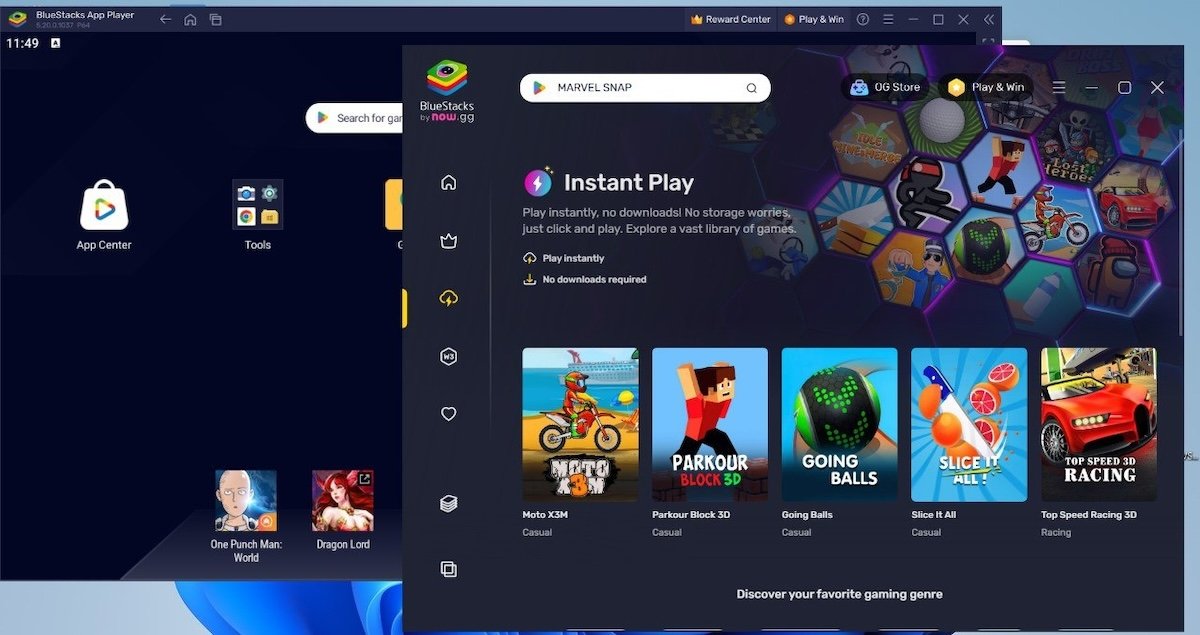 Differences between BlueStacks 5 and BlueStacks X
On the other hand, BlueStacks X is an application that leverages the same virtualization technology but prioritizes the execution of games in the cloud. Thus, the games it offers are mostly executed on an external server and do not consume your PC's resources. Moreover, the interface of this BlueStacks variant resembles more that of an app store than that of an emulator.
We recommend that if you want to emulate games and have the necessary resources on your computer (Bluestacks is not a demanding emulator), choose the classic version. The installer provided by the company may install both programs. If so, all you need to do is open BlueStacks 5 instead of BlueStacks X.

